

.png)

Barricade Flat Style Fender Flares
The Info:
Dirt Road Magazine was kindly supplied with a set of Barricade Flat Style Fender Flares
from Extreme Terrain that we could install on our not-yet-named Project '00 TJ and review for our readers!
Don’t want to read the info? Skip to the review
Why Upgrade?
There are two main reasons to modify your fenders and flares: a bit of extra tire clearance and awesome looks. After we lifted our TJ and started making use of our new sway bar disconnects off-road, we noticed our tires now had enough flex to try eat the edges of the fender flares, so we knew we needed more room soon. The stock fender flares hang down a few inches past the actual metal fenders, so by swapping to flat flares you gain just an inch or two, which was enough for us to hit our bumpstops and stop the intereference with our tires.
What Upgrade?
There are two styles of fender upgrades, full fender replacements and fender flare replacements. Full fender replacements are often metal and offer an armor upgrade, and replace the entire stock fender, plastic and metal. Because it replaces everything, these upgrades can net you the most clearance. Fender flare replacements just replace the plastic flare, but if you only need a little extra clearance, or want a cheaper upgrade, these can be a great option.
Other stuff:
It's worth mentioning that '00 TJ has been completely LED converted, including Converting The Side Markers To 3-Wire. This means your new side markers may perform differently out of the box, and may cause issues that LED sidemarkers usually present to our Jeeps. The conversion isn't difficult though, so check out that forum thread if you notice issues.
The Kit:
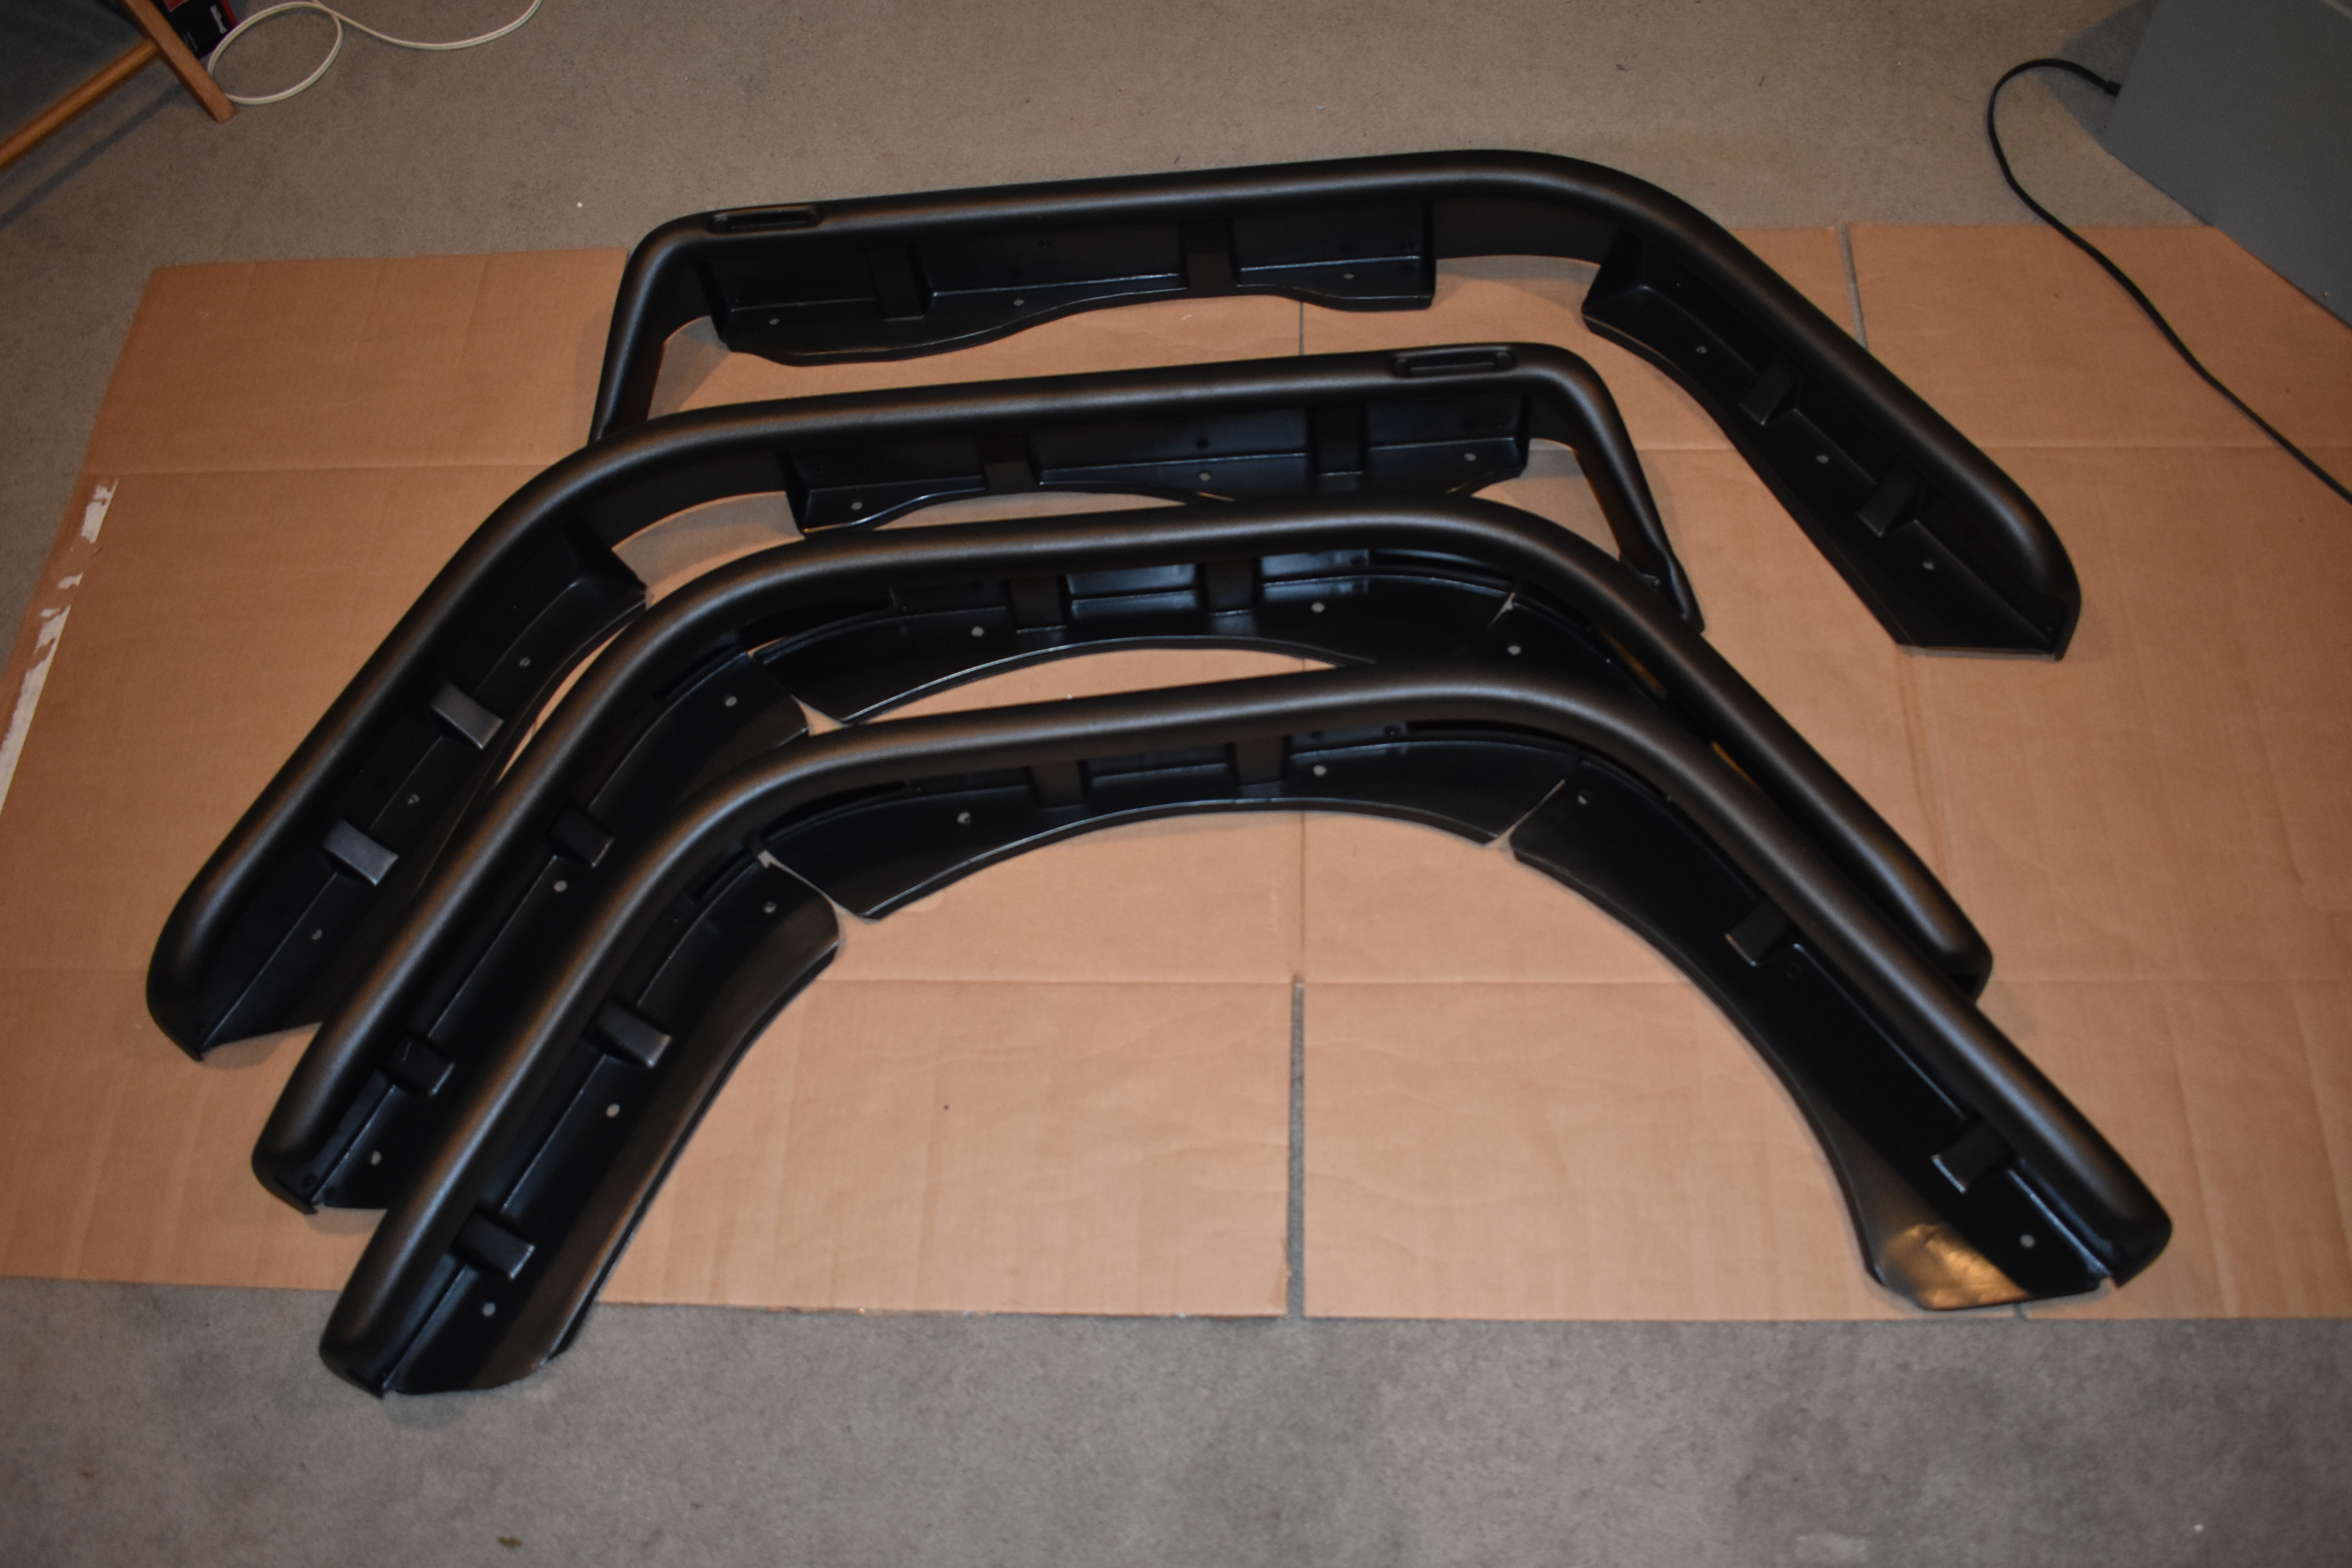
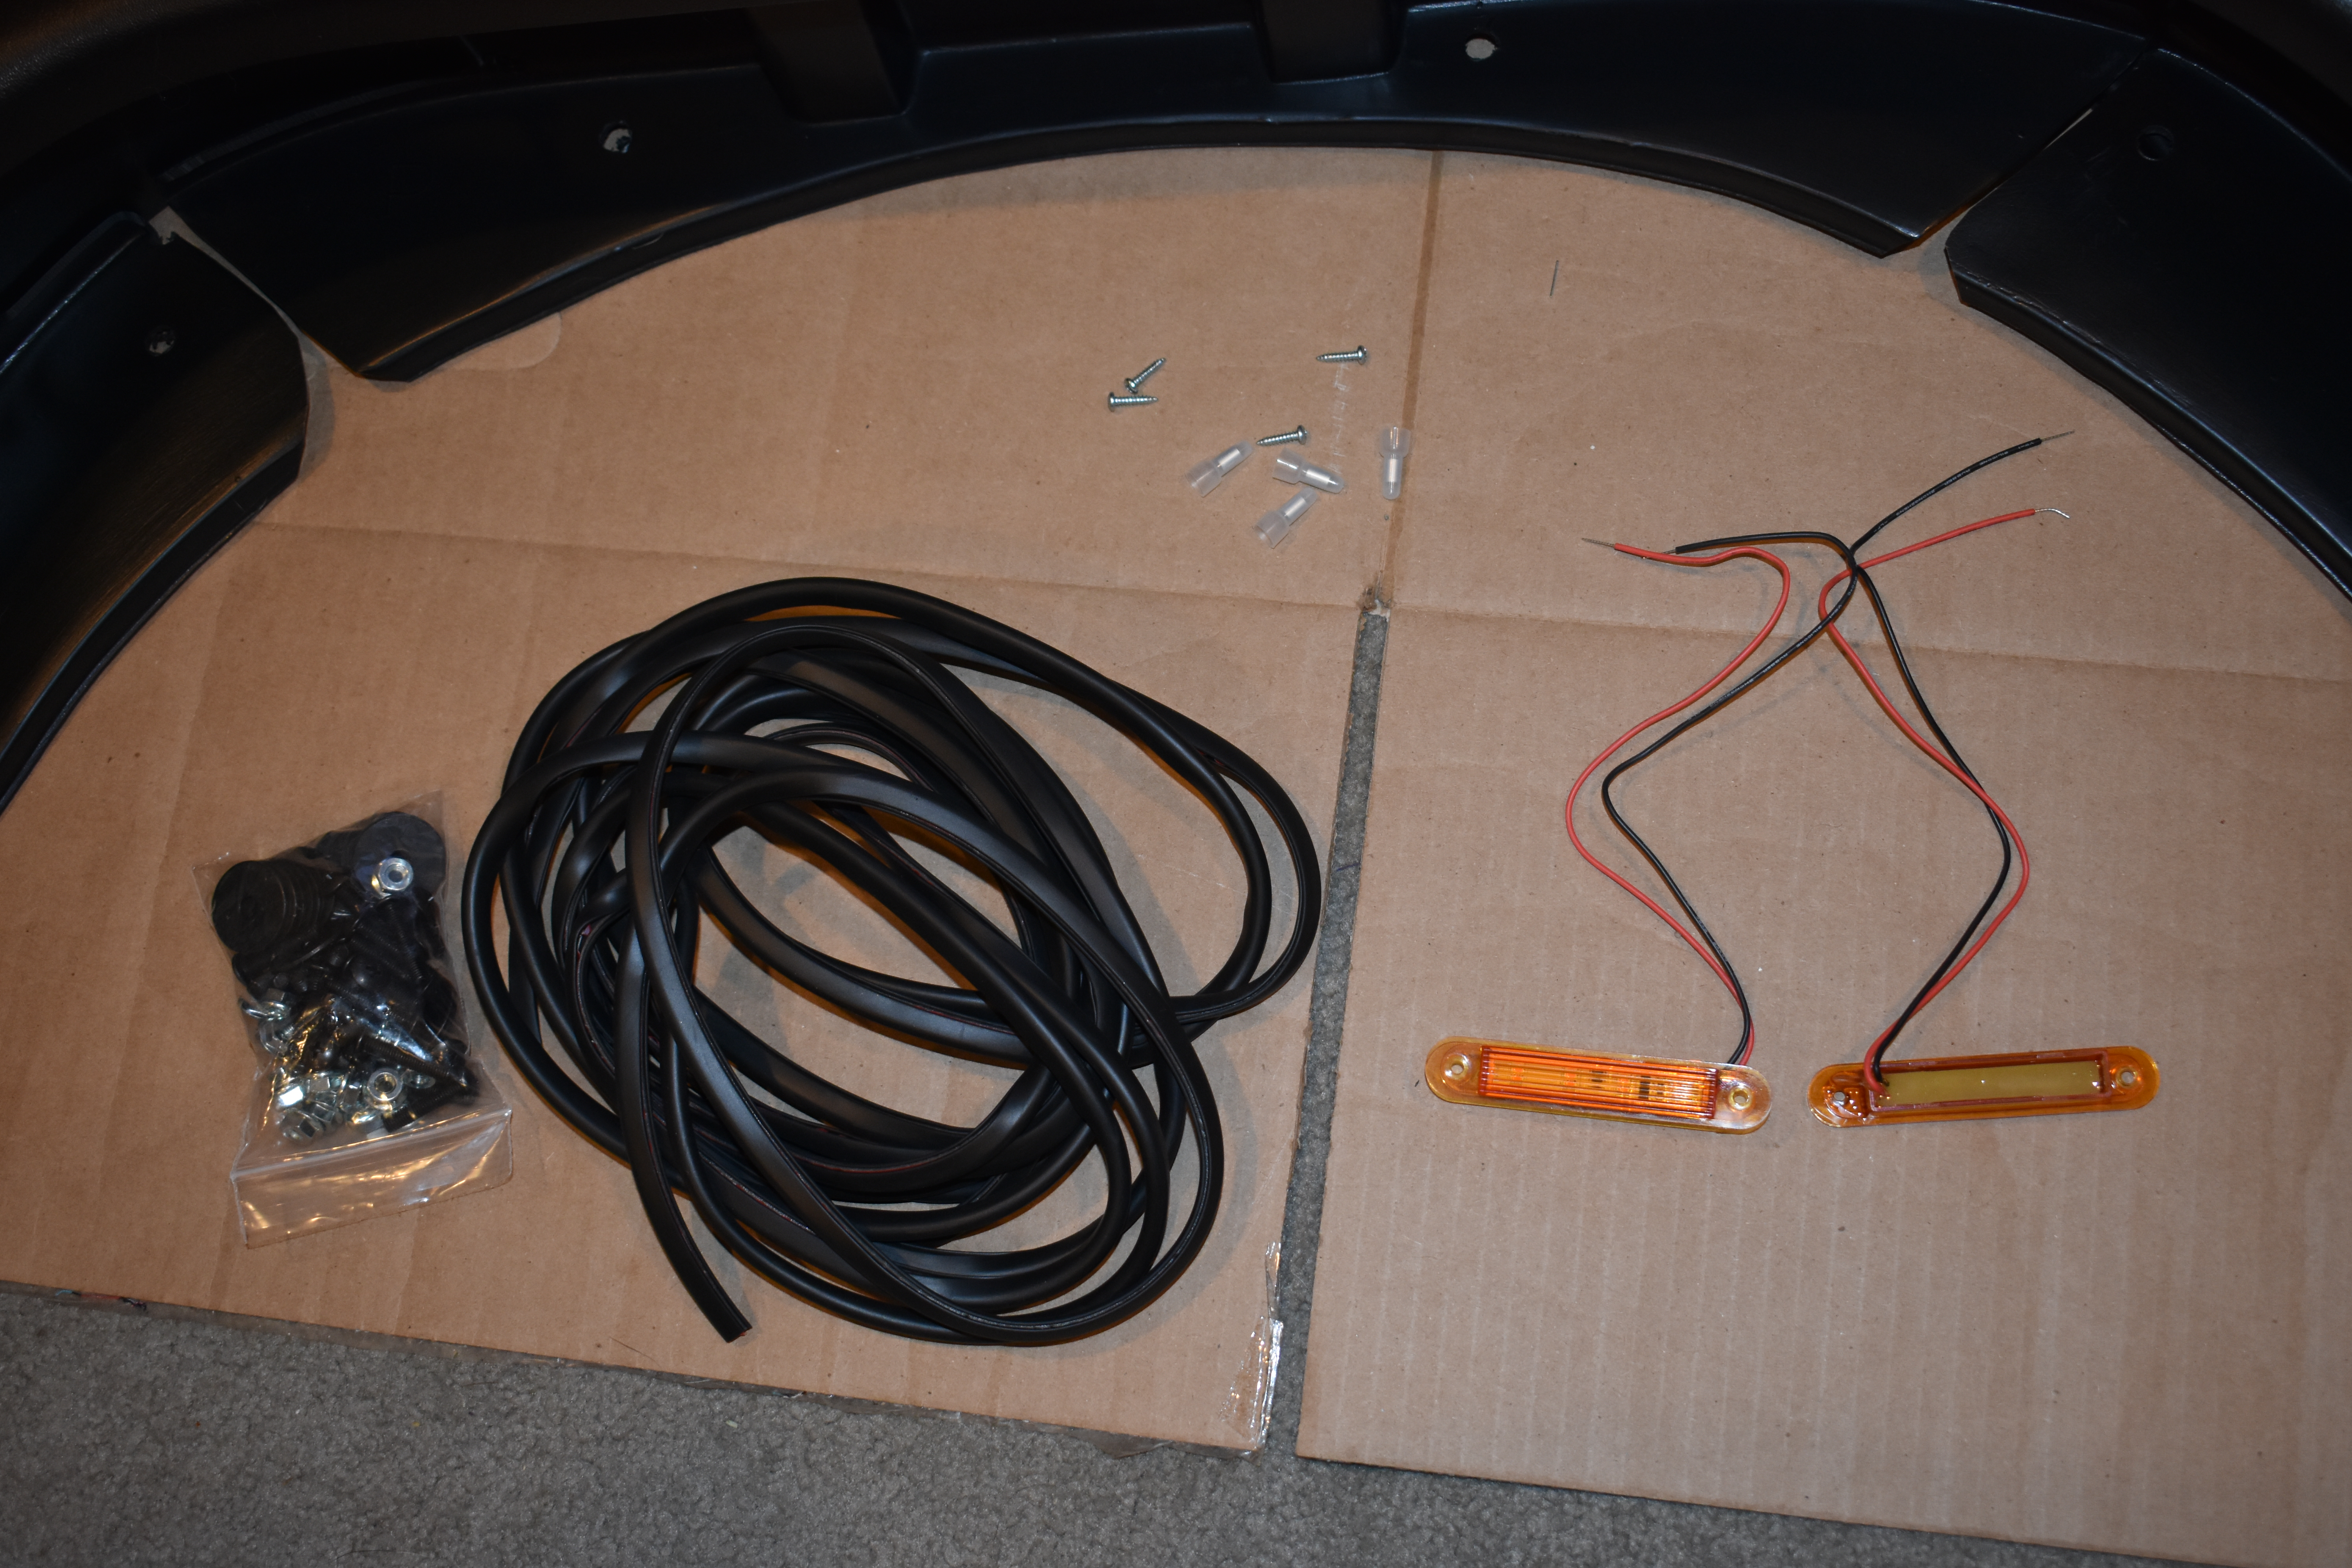
The kit came fairly well packaged, each flare was wrapped in a platic bag to help prevent damage. The flares themselves seem very nice, and quite flexible, this helps them bounce back when you smash them into rocks instead of cracking or shattering. They are made of a multi-piece ABS plastic design, which seems to be fairly durable. The kit also comes with all the hardware you need for an ideal install, but we'll talk more about that later.
The Tools We Used:
- PPE: Safety glasses, Gloves, etc...
- Basic mechanics tools:
- Wrenches, screwdrivers, and the likes
- Pliers
- Plastic "christmas tree" trim fastener tool
- Wire cutter and crimping tool
- Drill with 1/16" drill bit
Tools we needed for the problem areas:
- Locking pliers
- Rivet nut tool
- Grinder
- Mallet
- Paint for the tub
Not bad, no special tools needed for an "ideal" install, just know that you might need to be creative if you run into issues like we did.
The Prep Work:
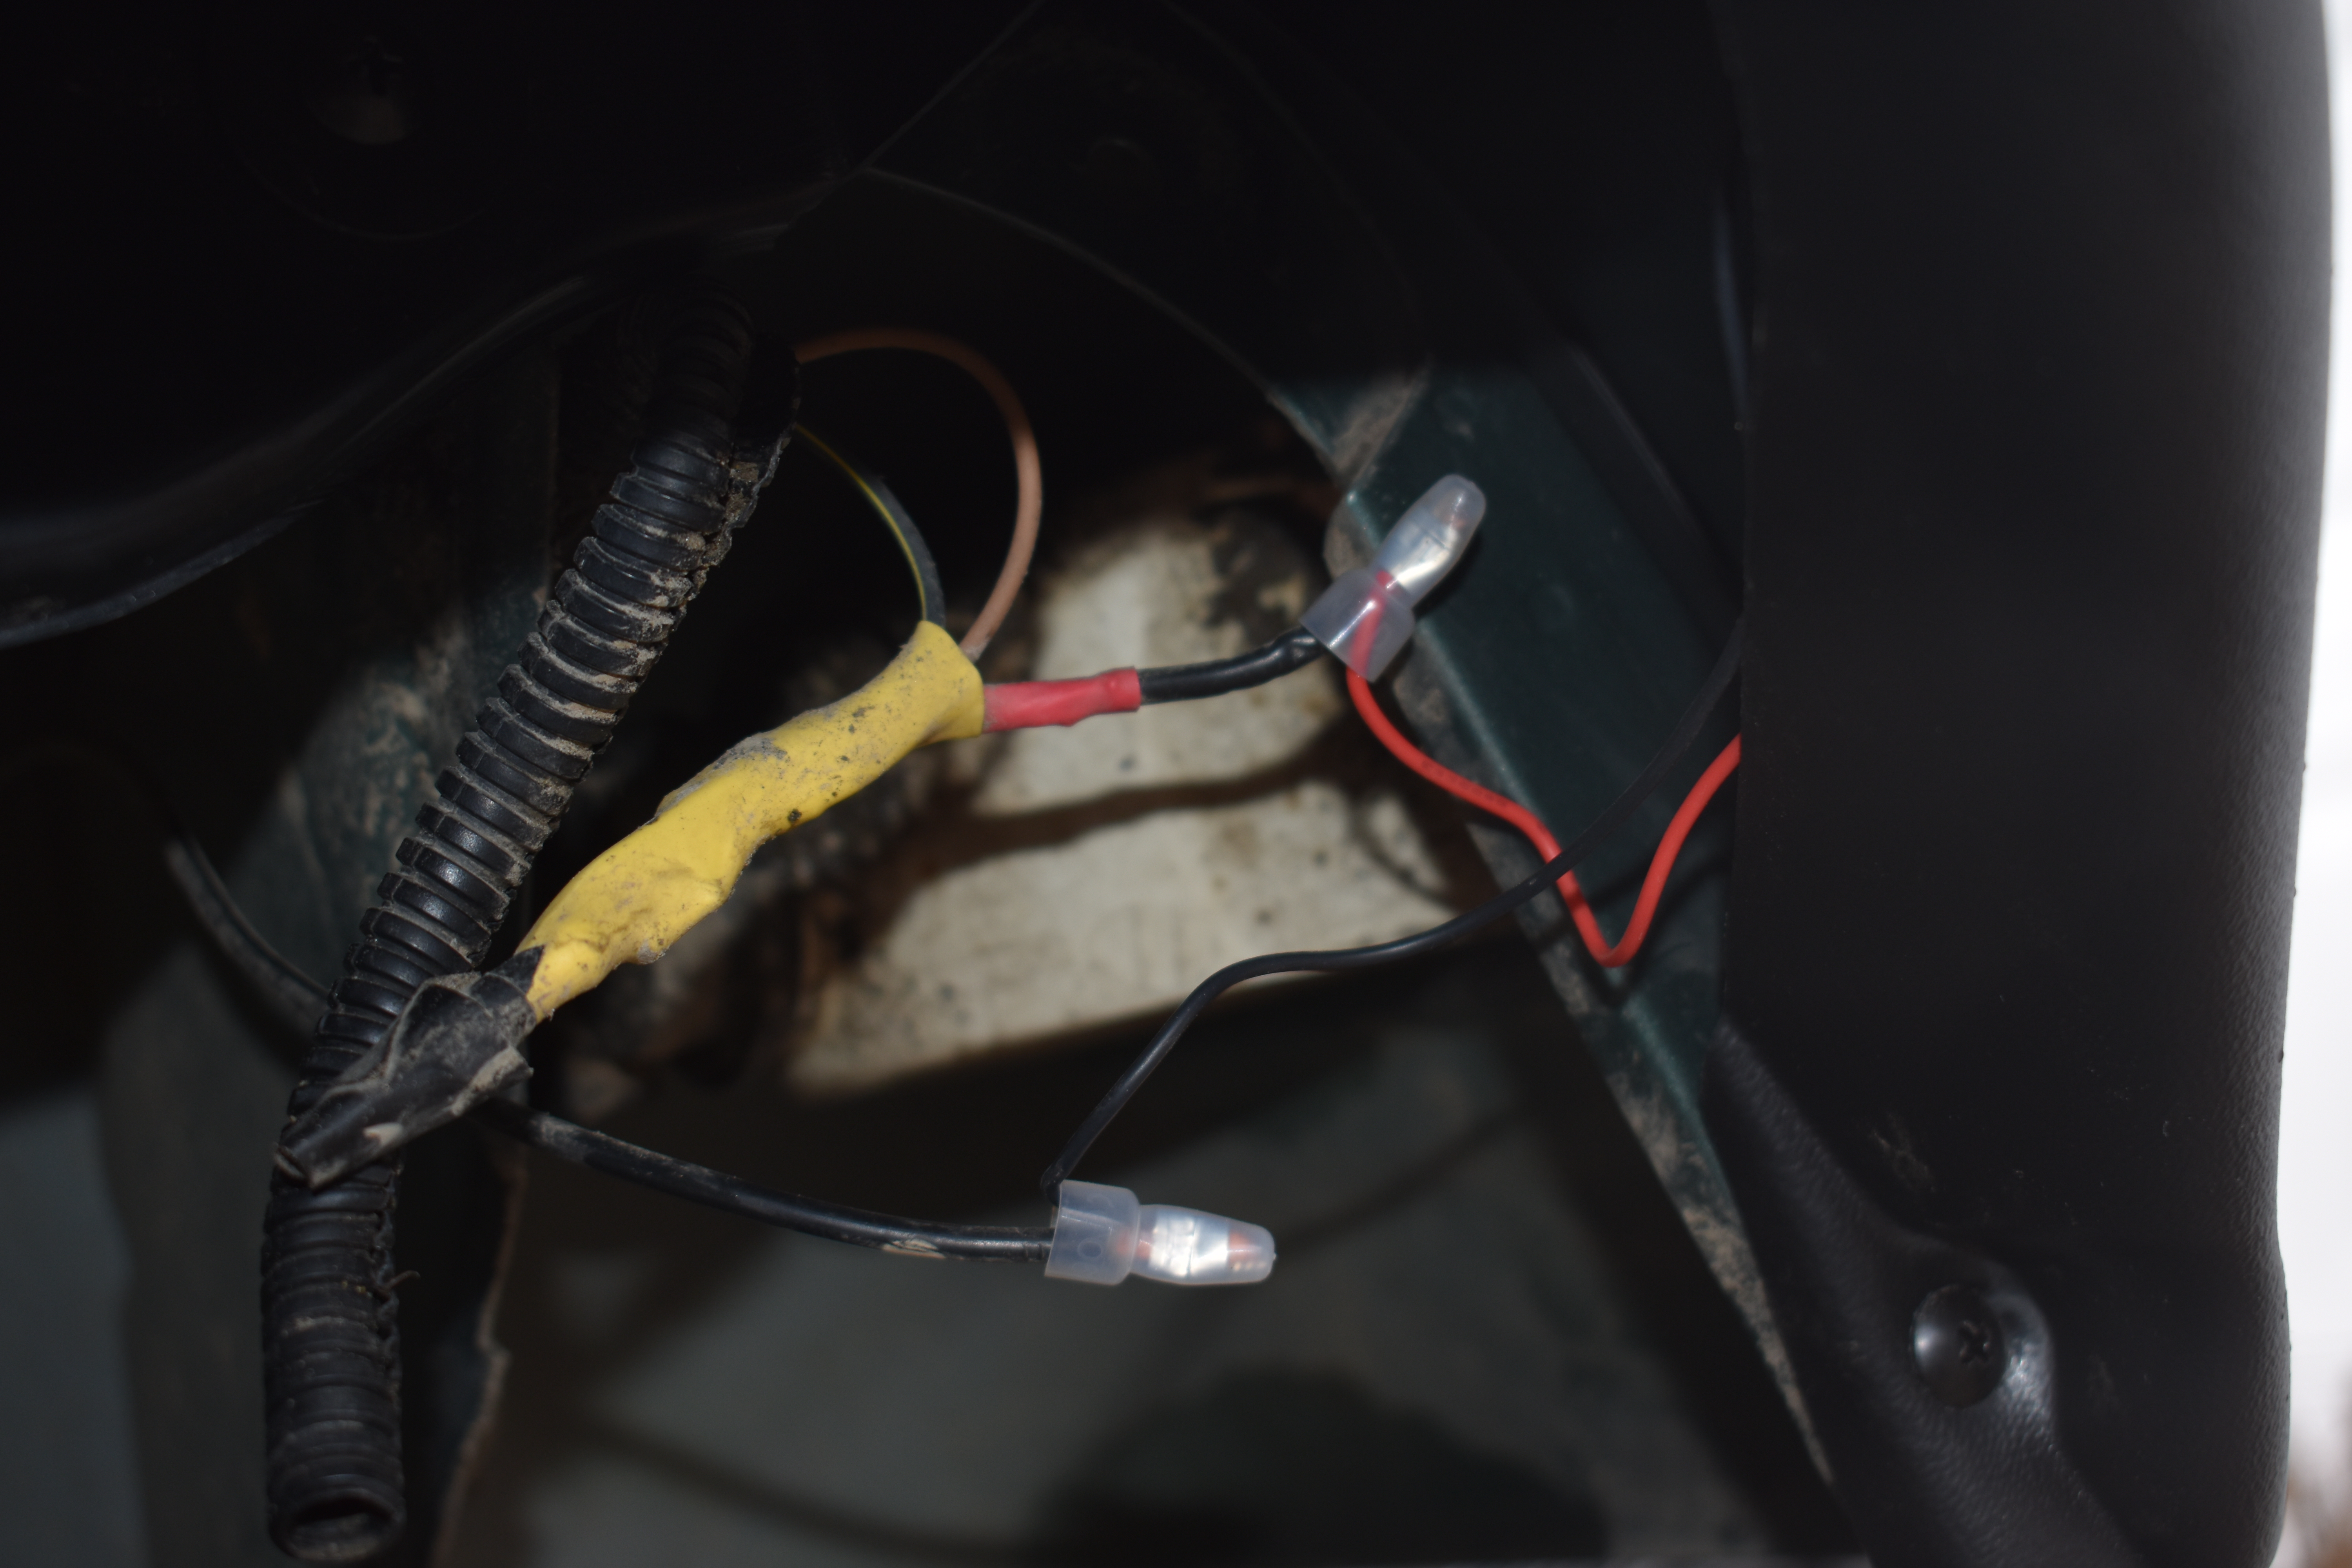
Just a little prep work here, we need to install the side marker LEDs into the front flares, and apply the rubber lining to the inside of each flare.
Rubber Lining:
All you have to do is wrap the rubber liner around the back edge of each fender. It comes in a long strip, and we found it easiest to put the strip into place along the entire length, then cut it, and finally peel the red tape covering the adhesive out while the rubber was already in place. Don't worry about running out of lining, they give you about a foot extra, so you shouldn't end up with any short pieces.
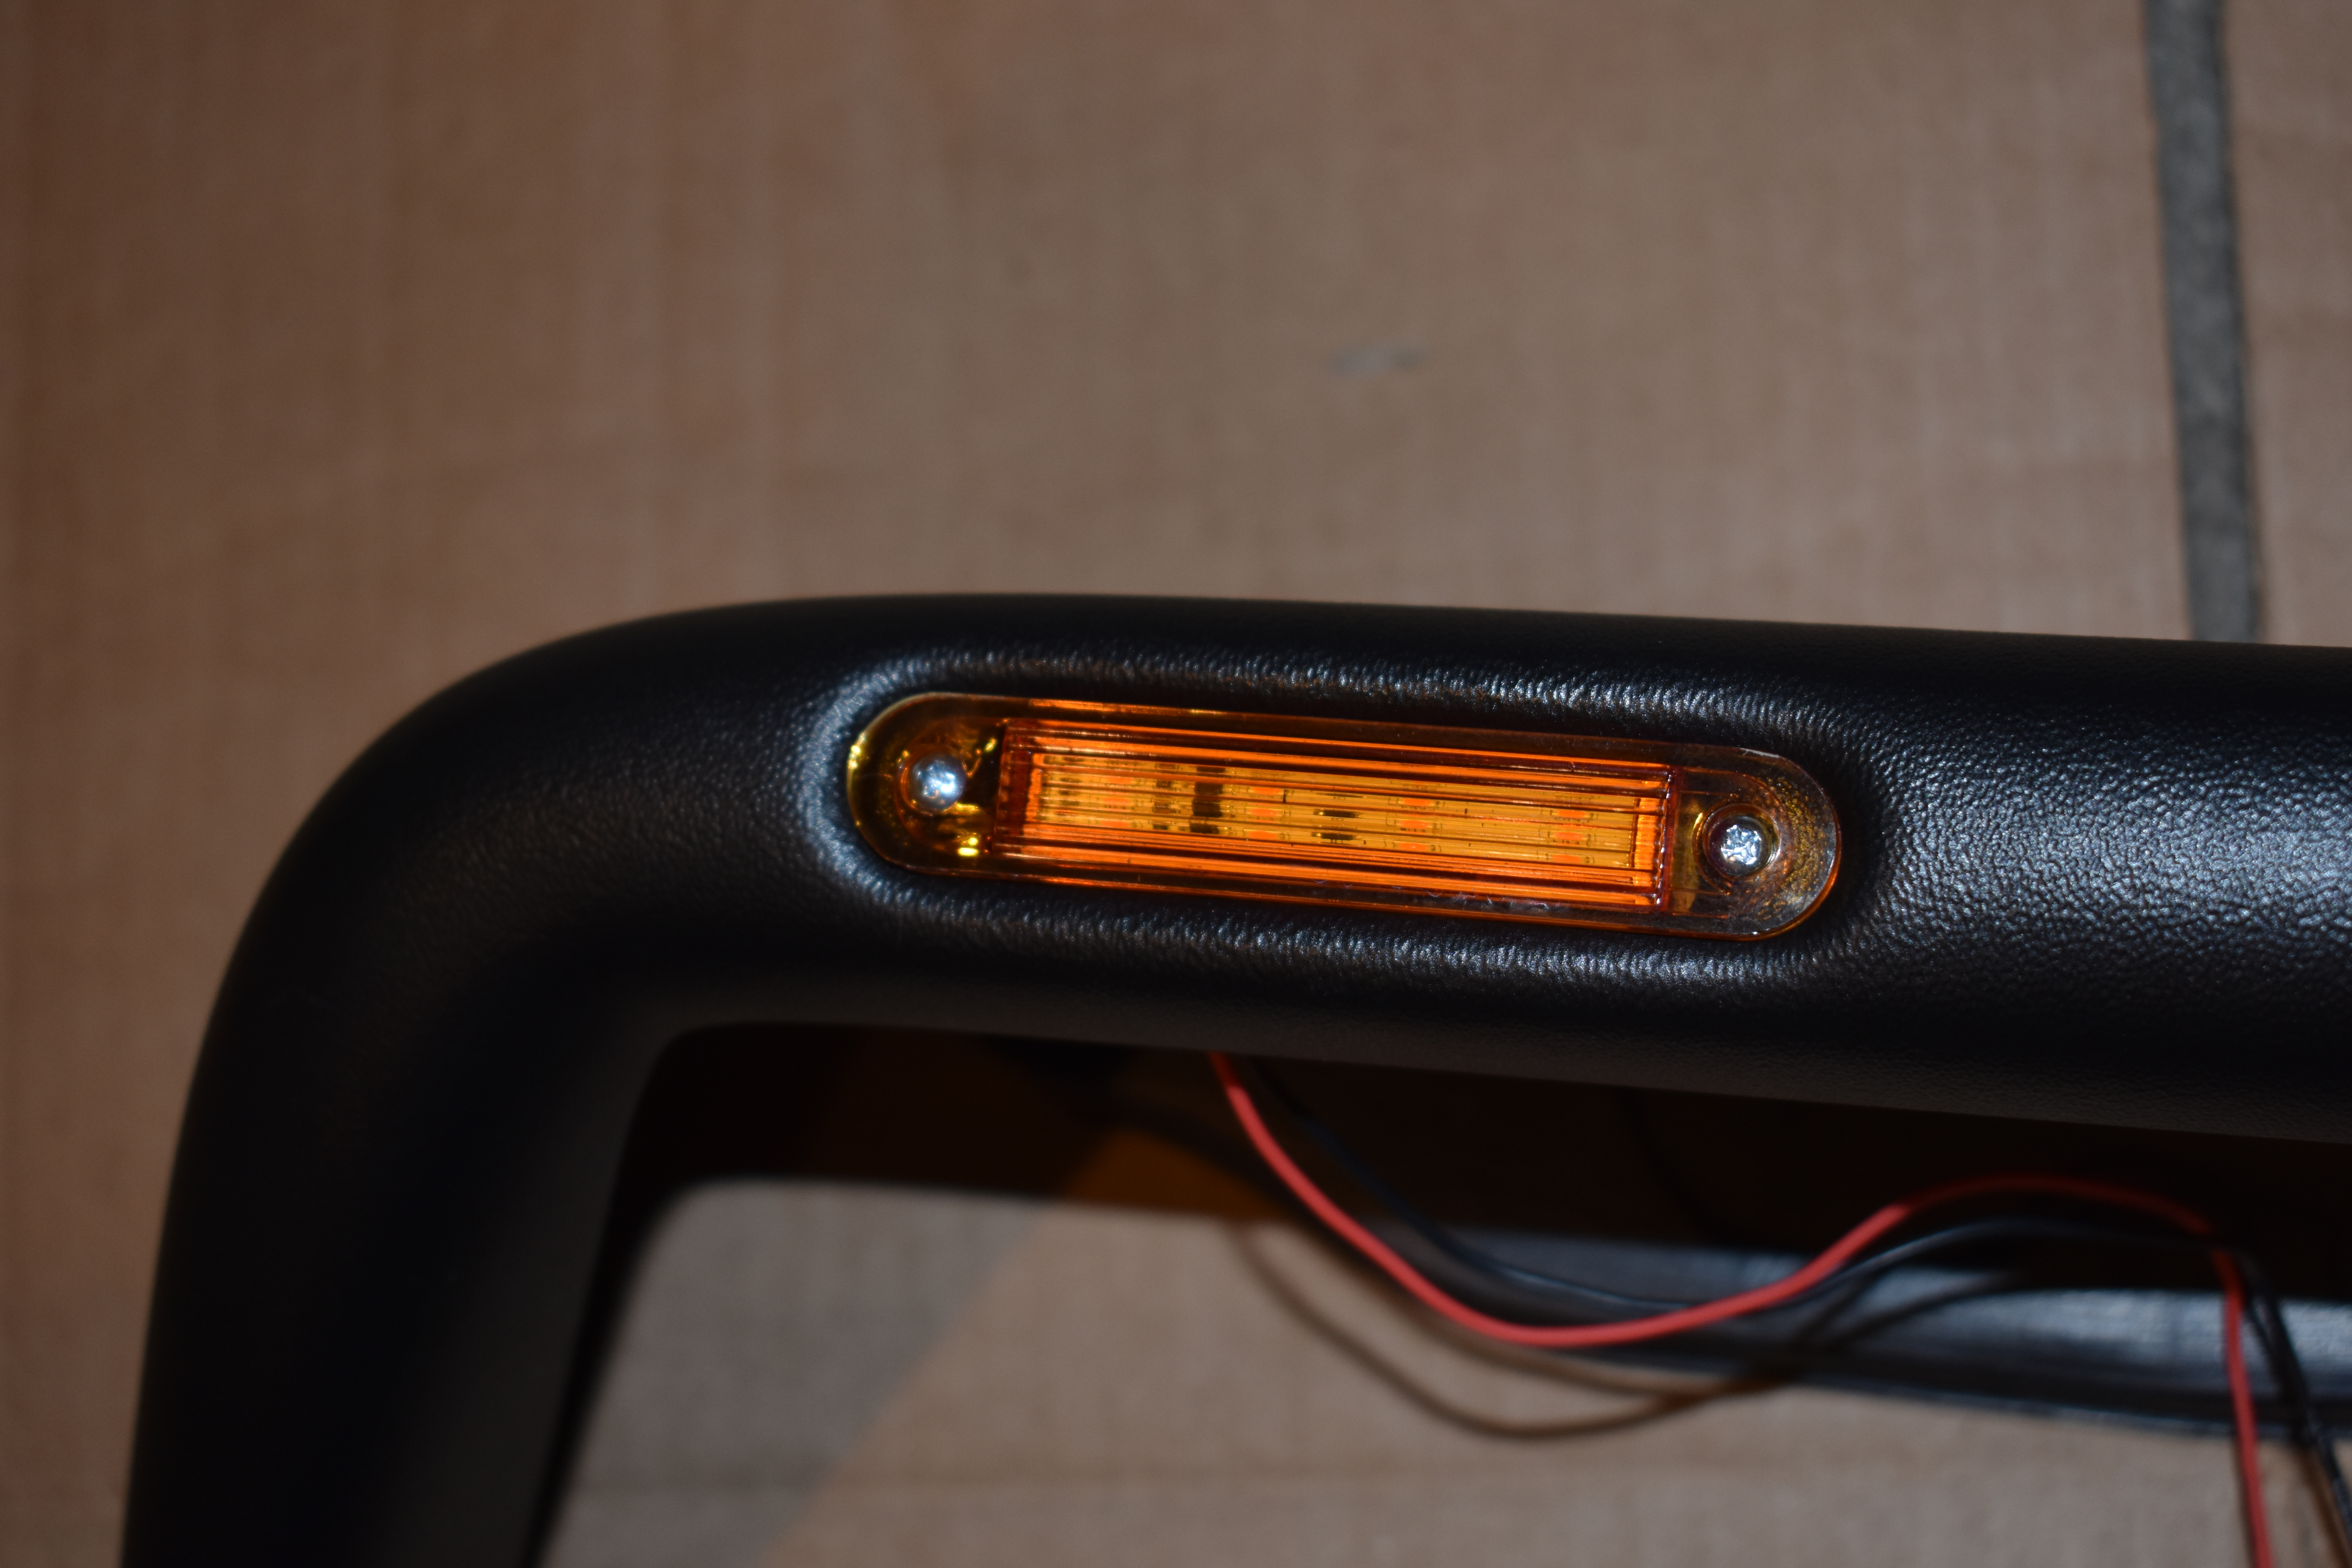
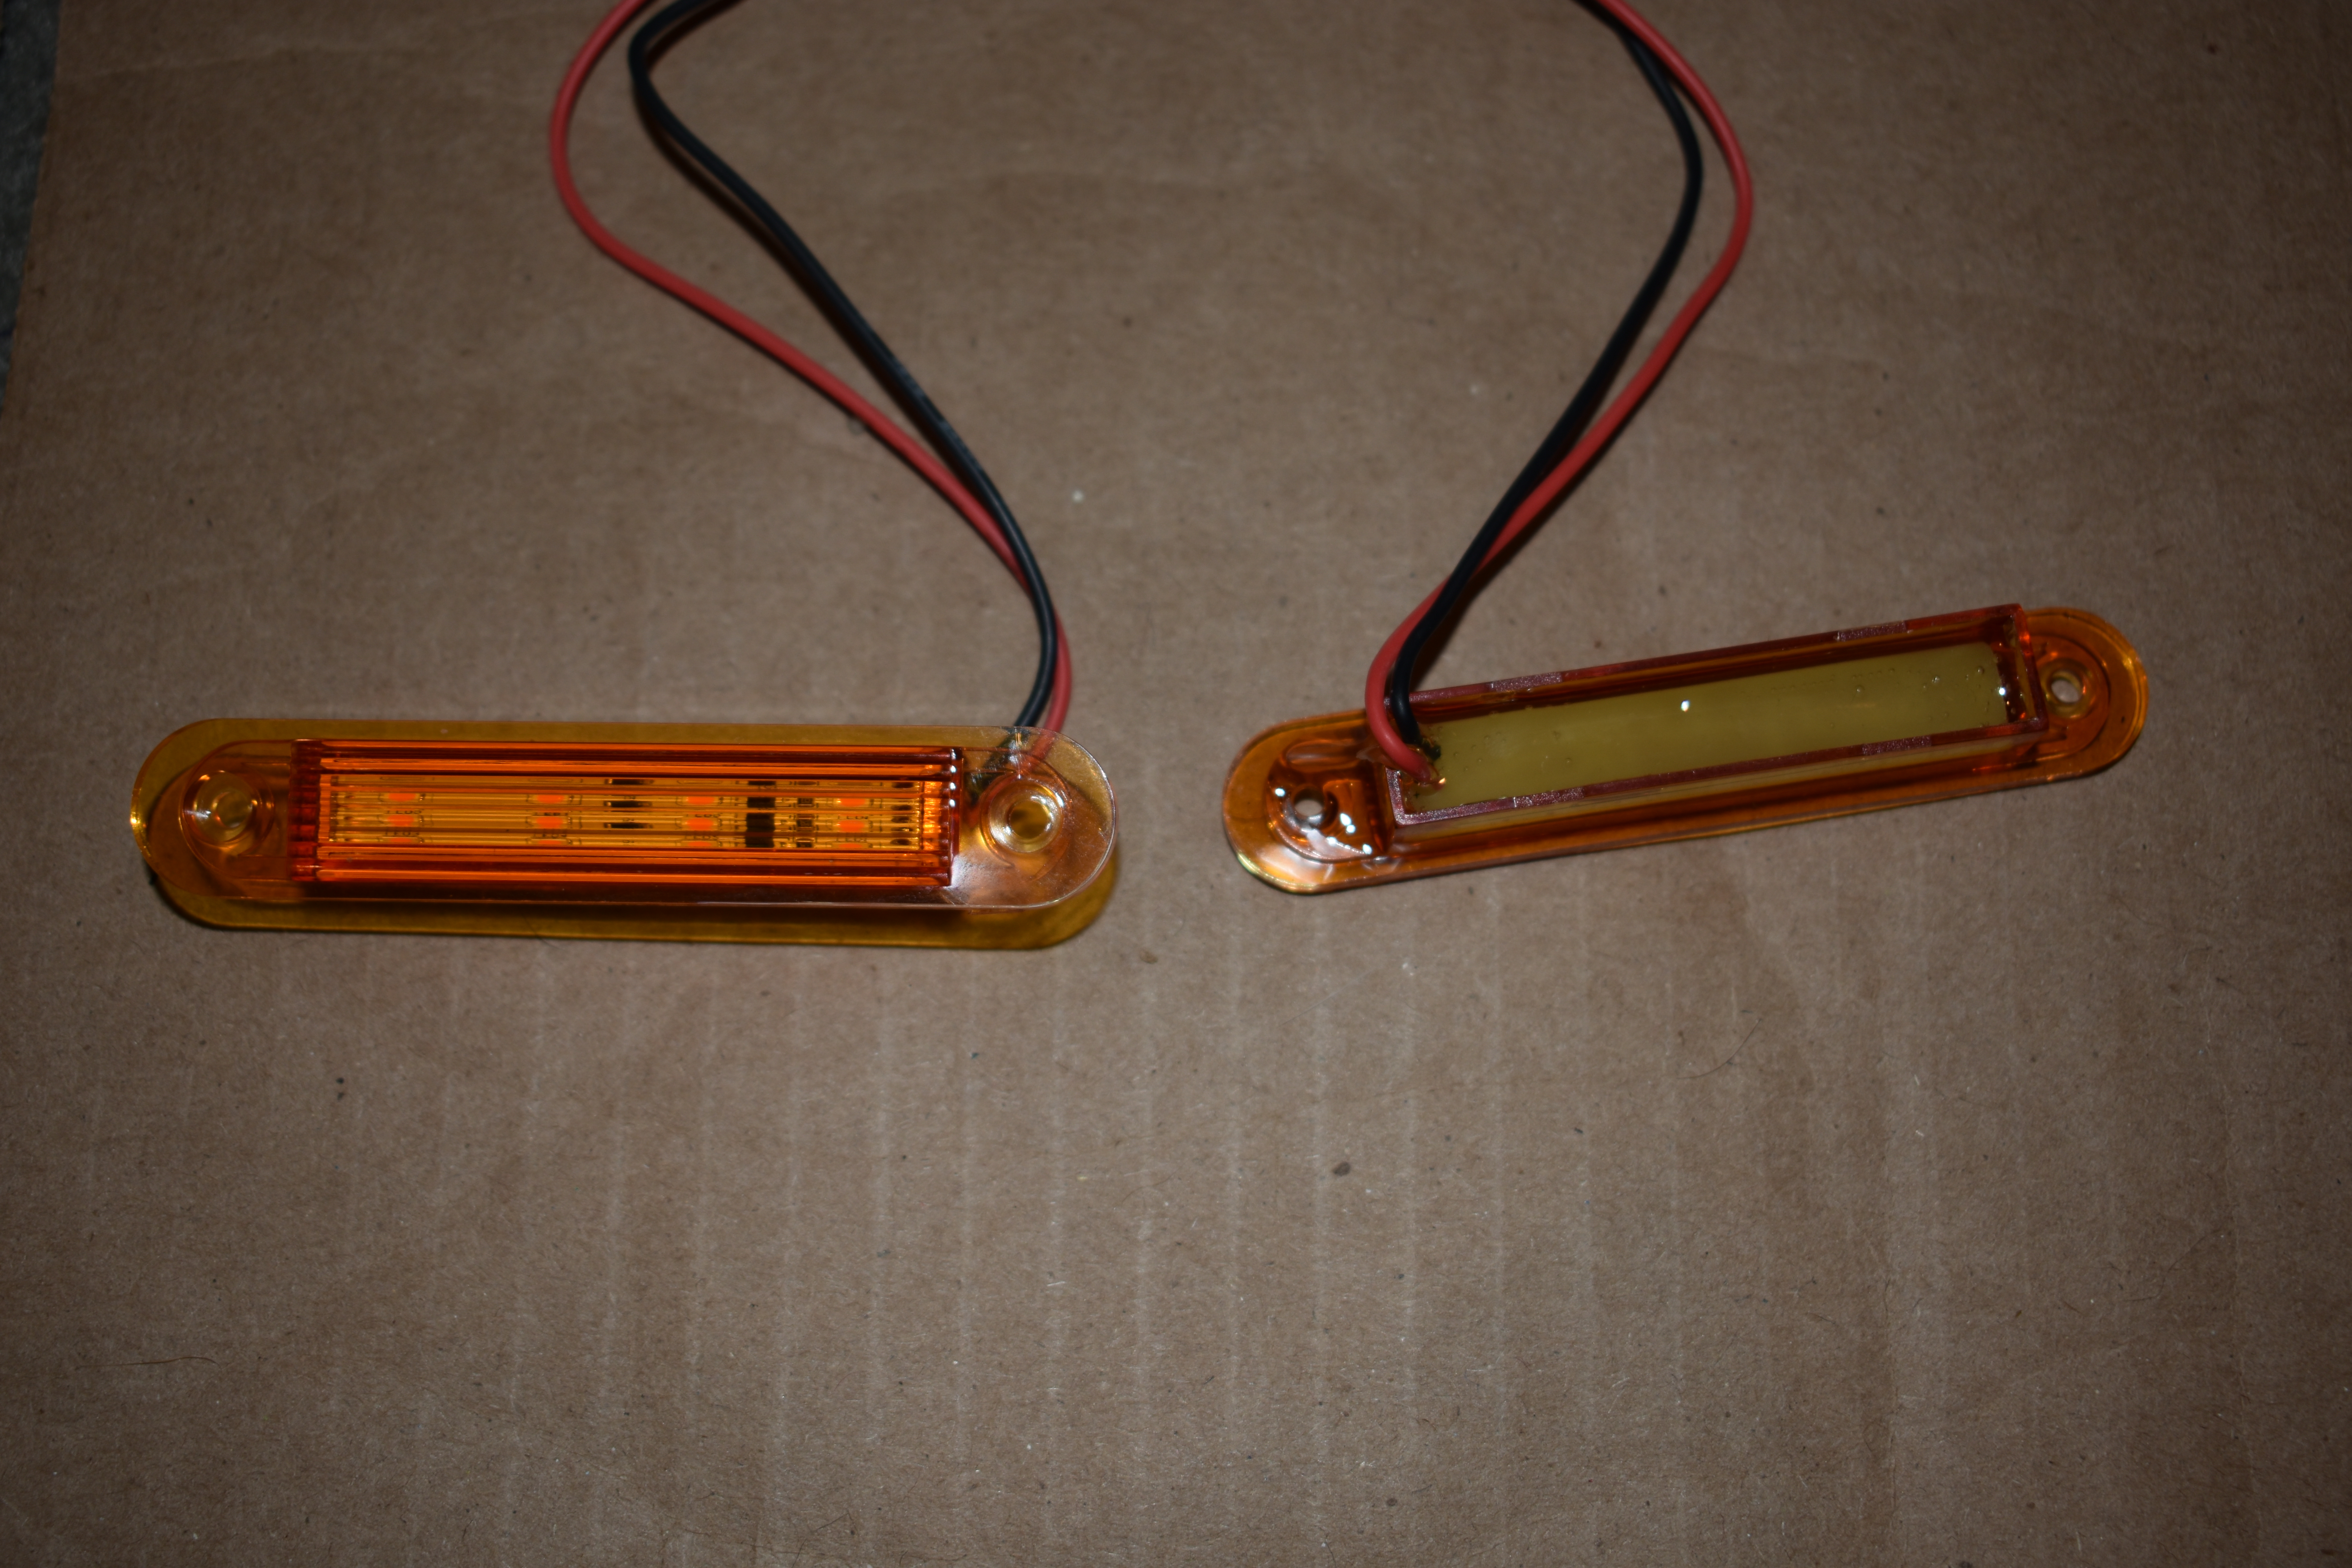
Side Markers:
The lights are easy too, but you will need a drill and a 1/16" drill bit, as well as a phillips screwdriver.
The first step is to run the light wires through the access hole in the fender:
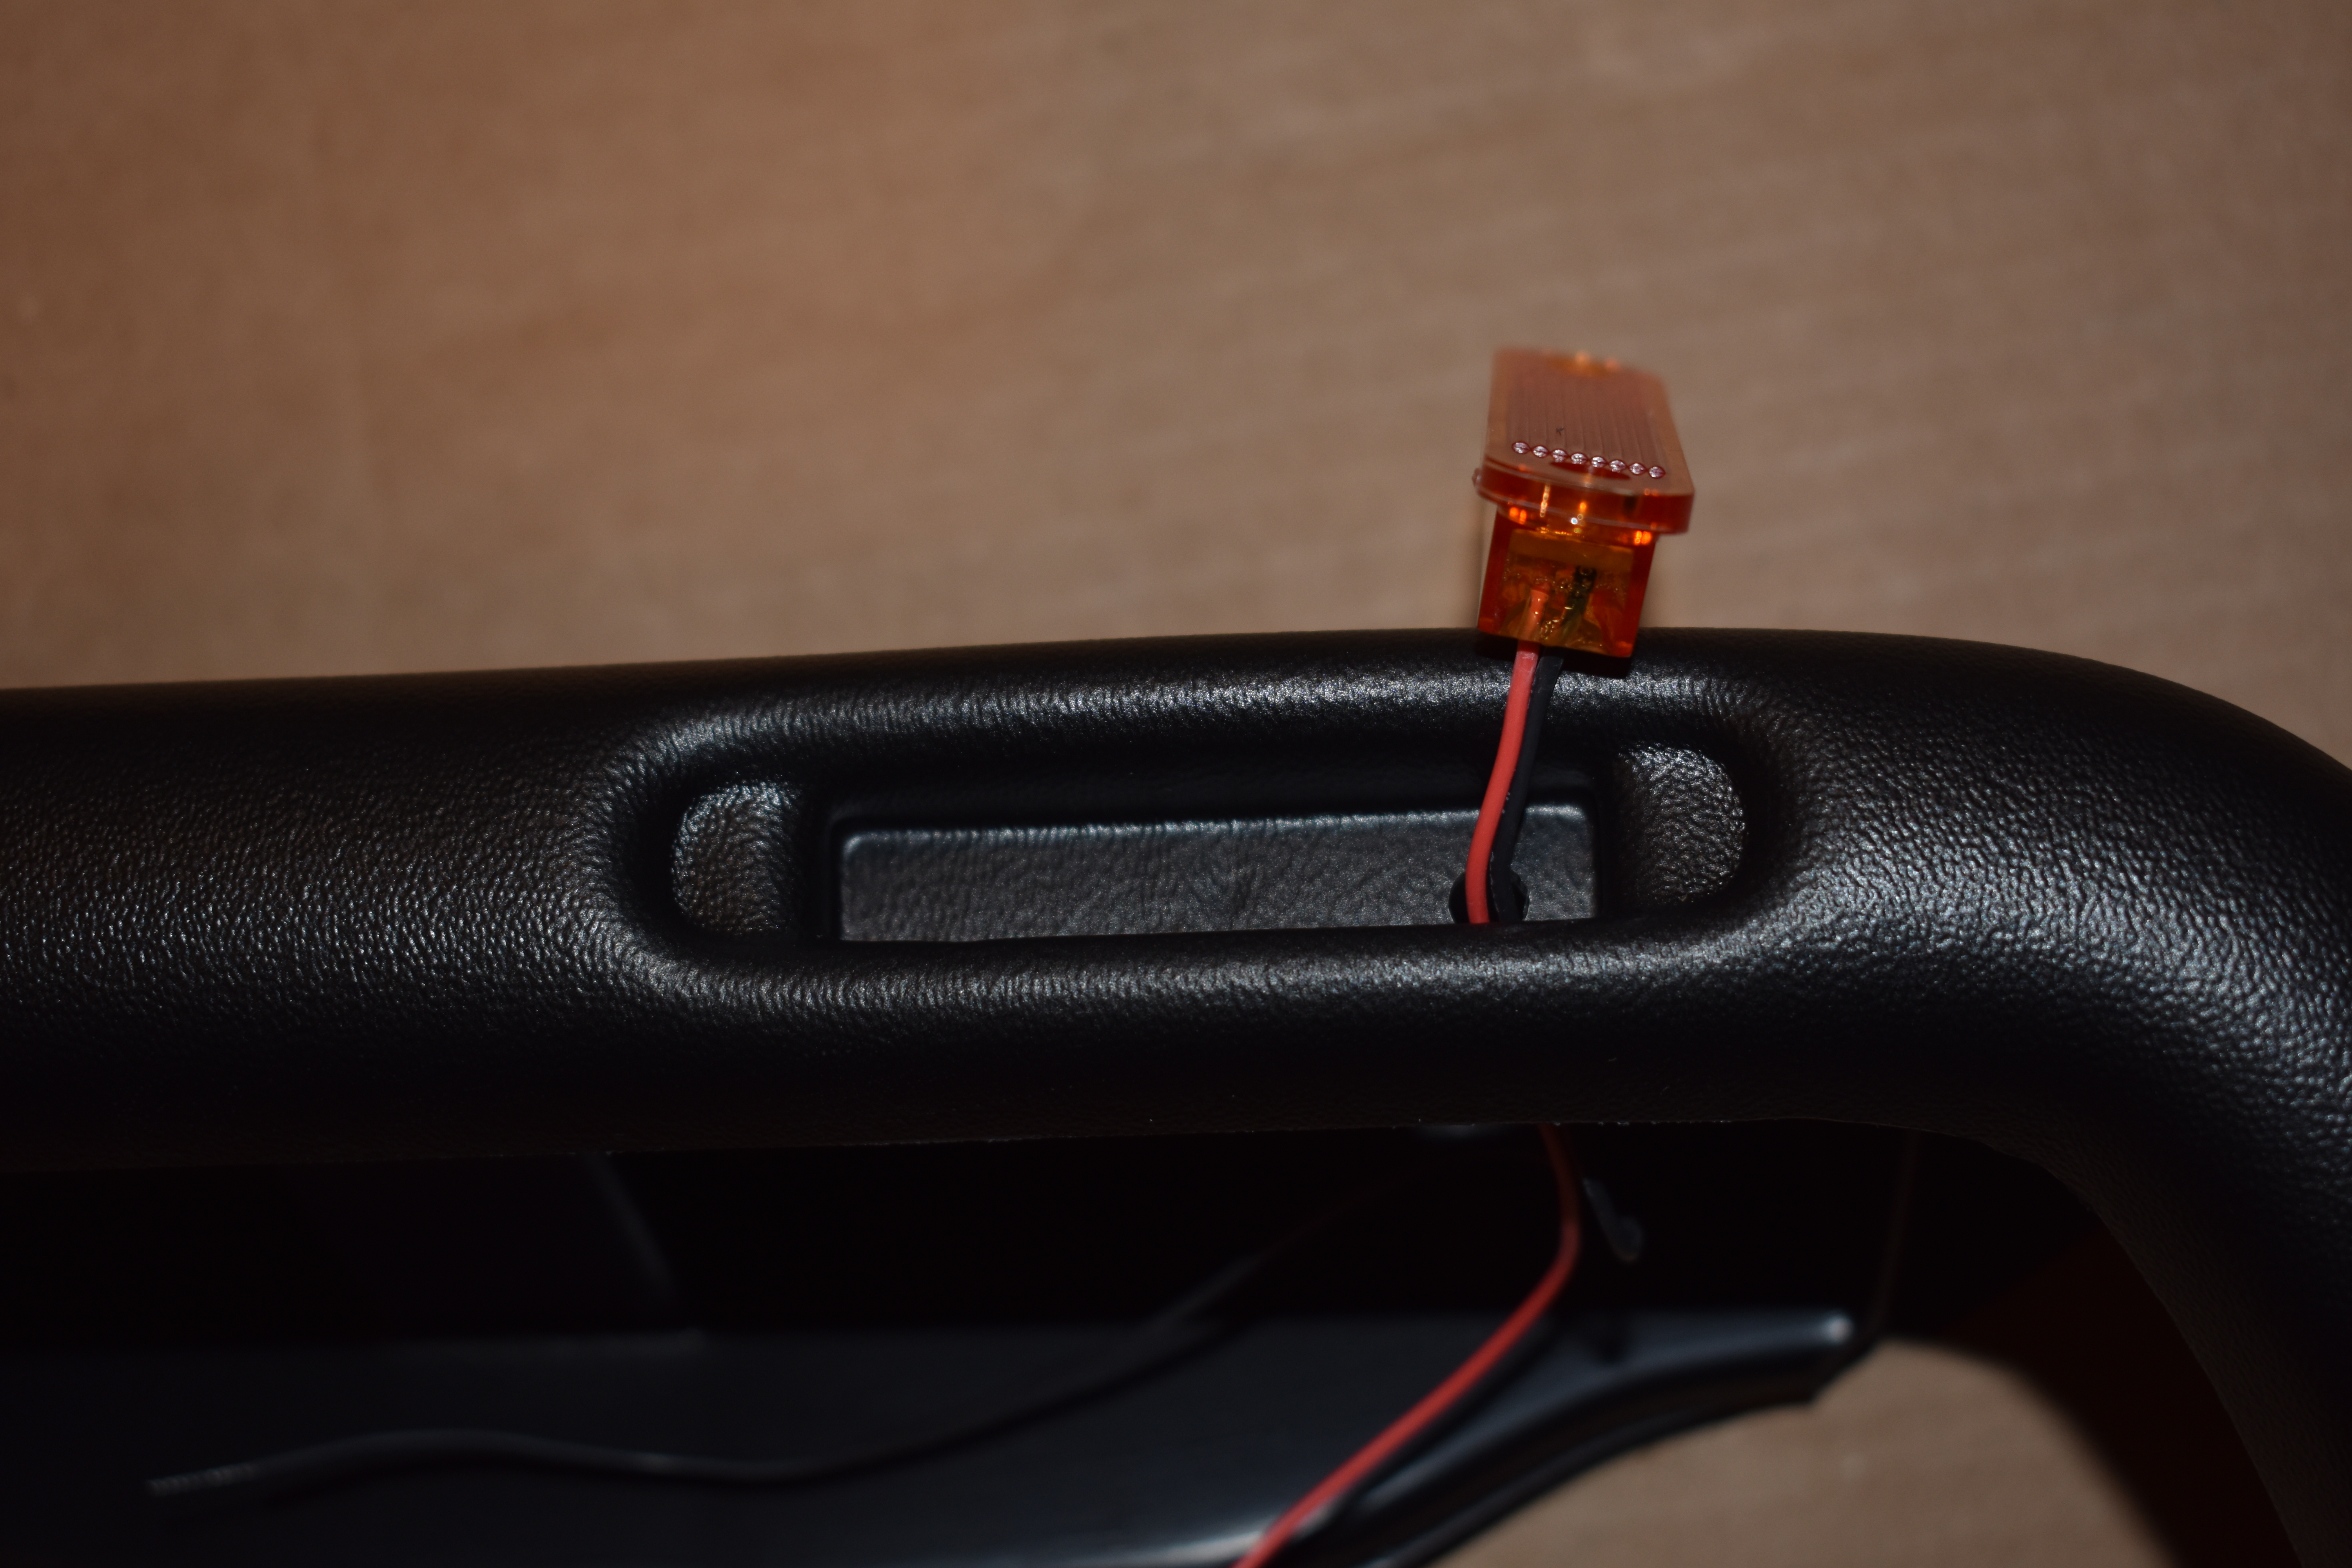
Next we gently press the sidemarkers into place in the flares:
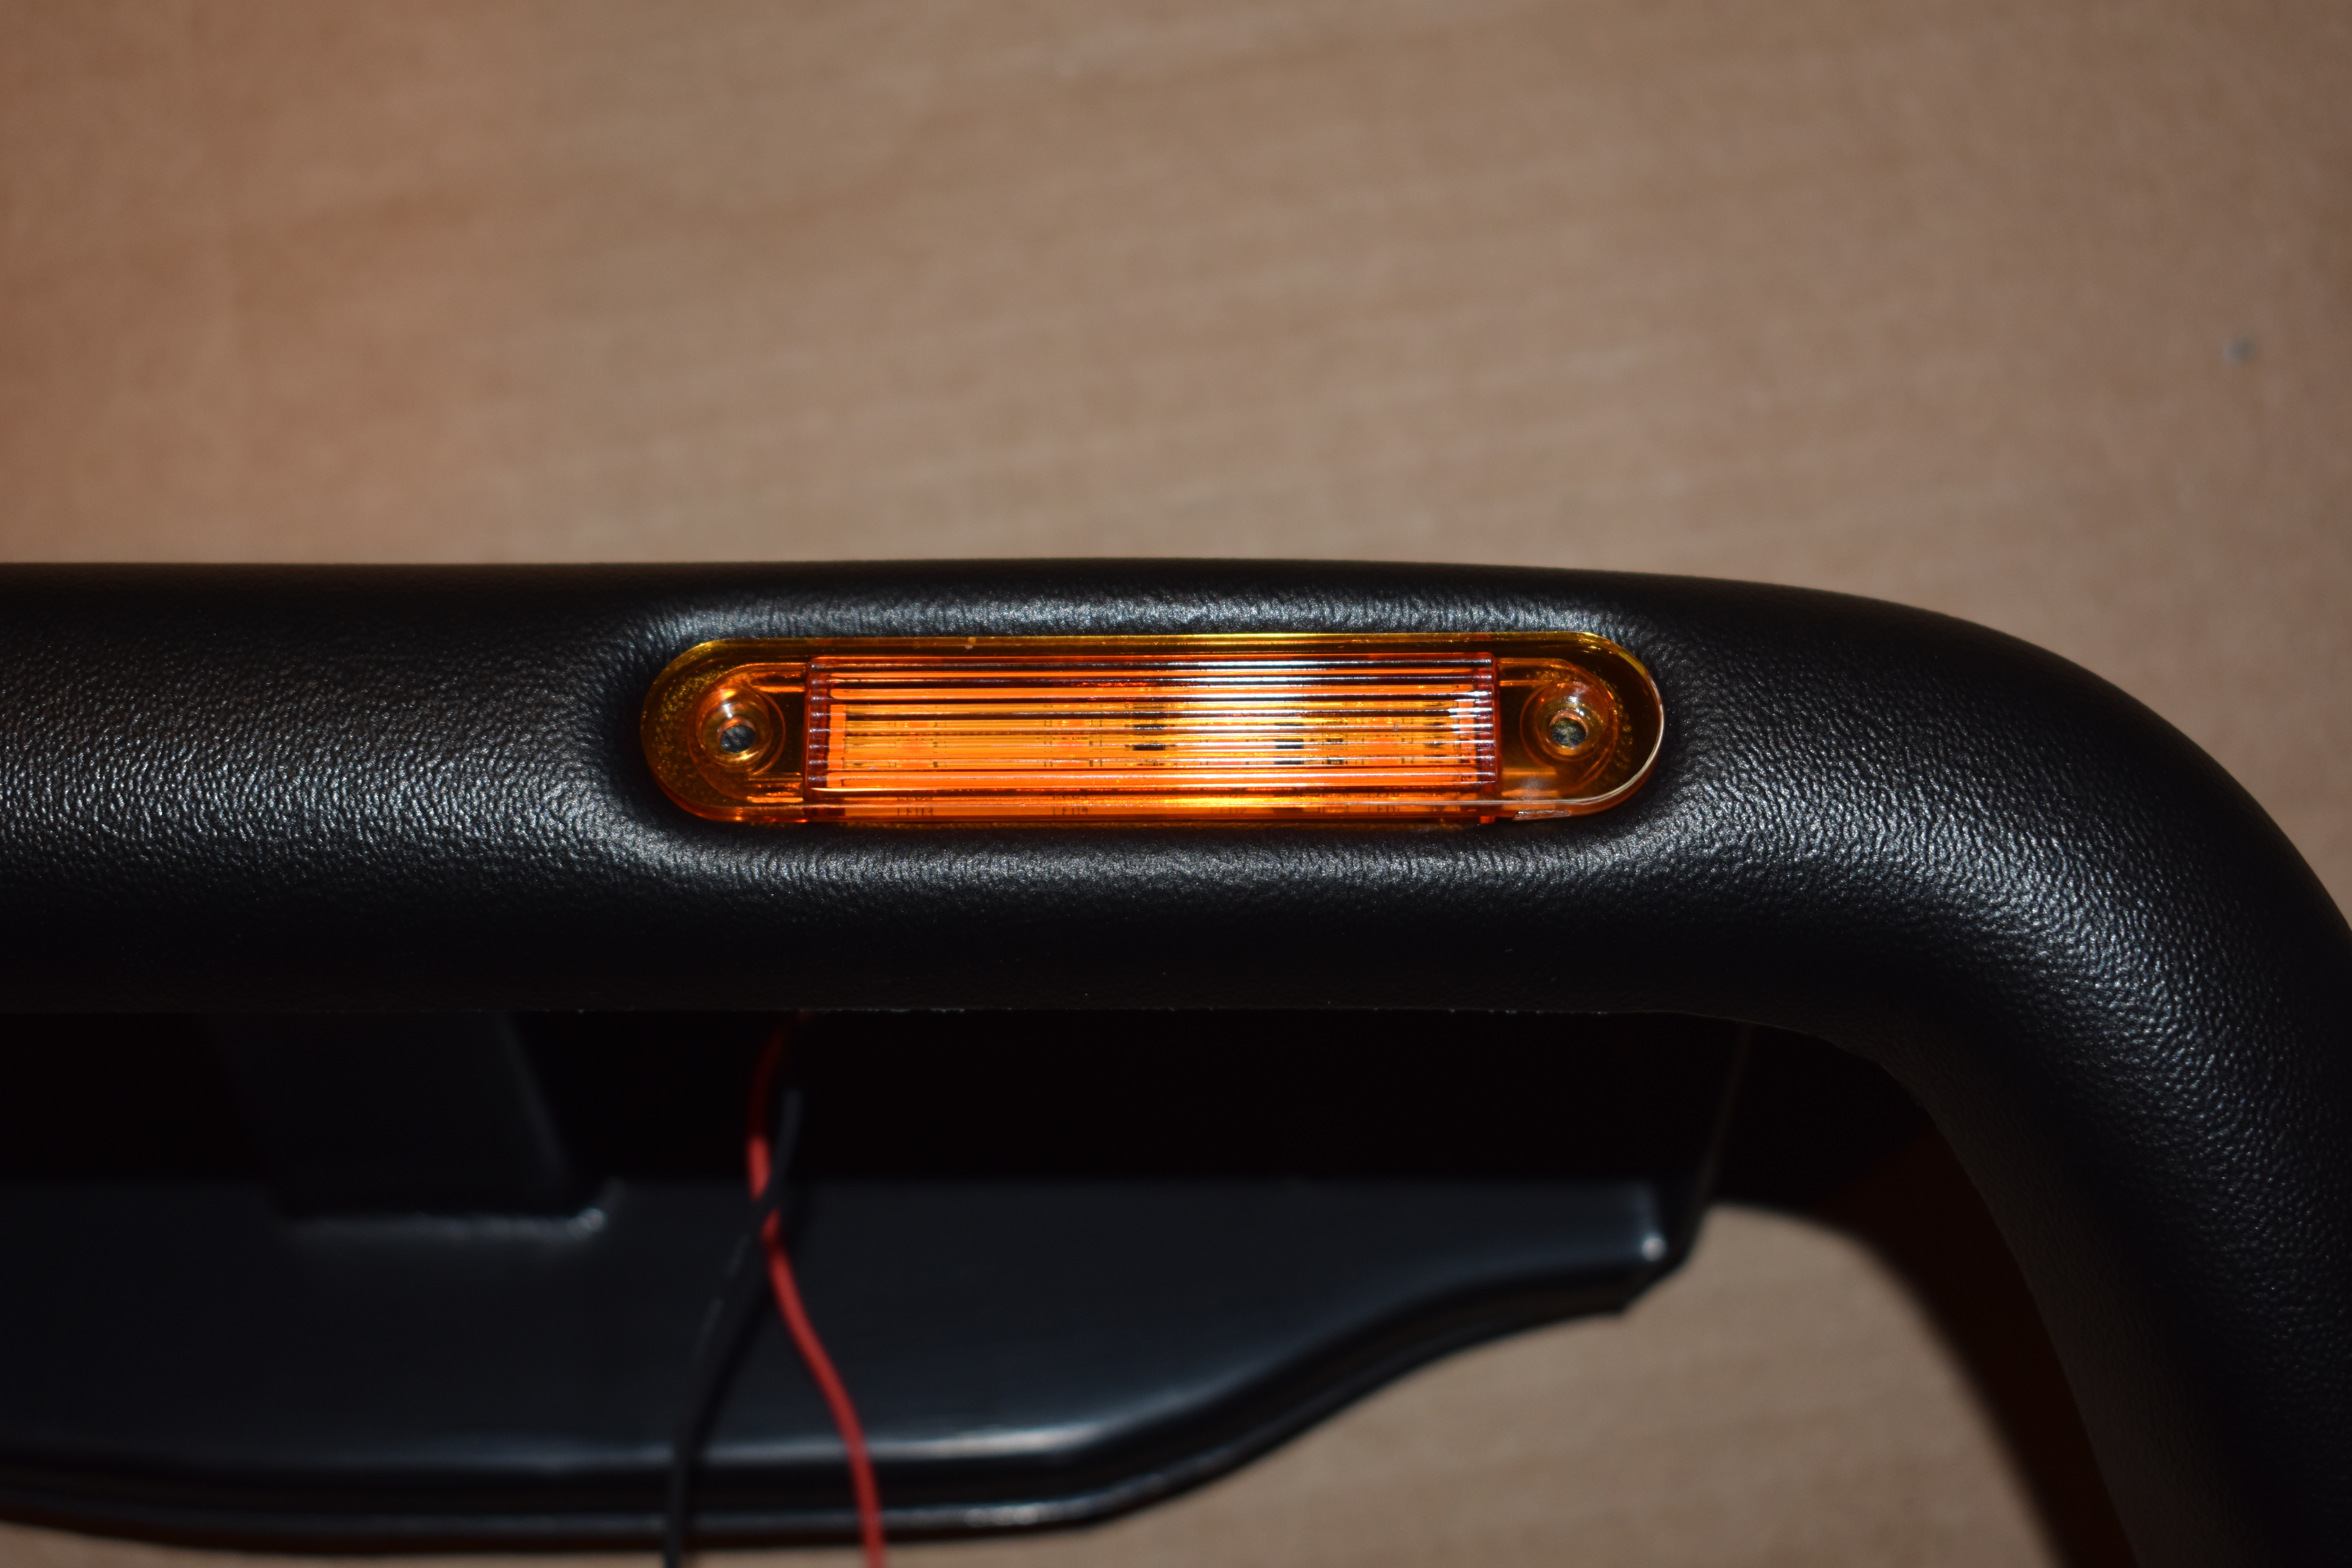
Now we need to drill through the flares where the screw holes for the side markers are. Once you drill these holes, attach the lights with the included screws and you're ready to install! The instructions recommend taping the side marker wires out of the way, but we just worked around them with no real issue.
The Install:
The Instructions:
Instructions From Extreme Terain
The Removal:
This part is simple in theory:
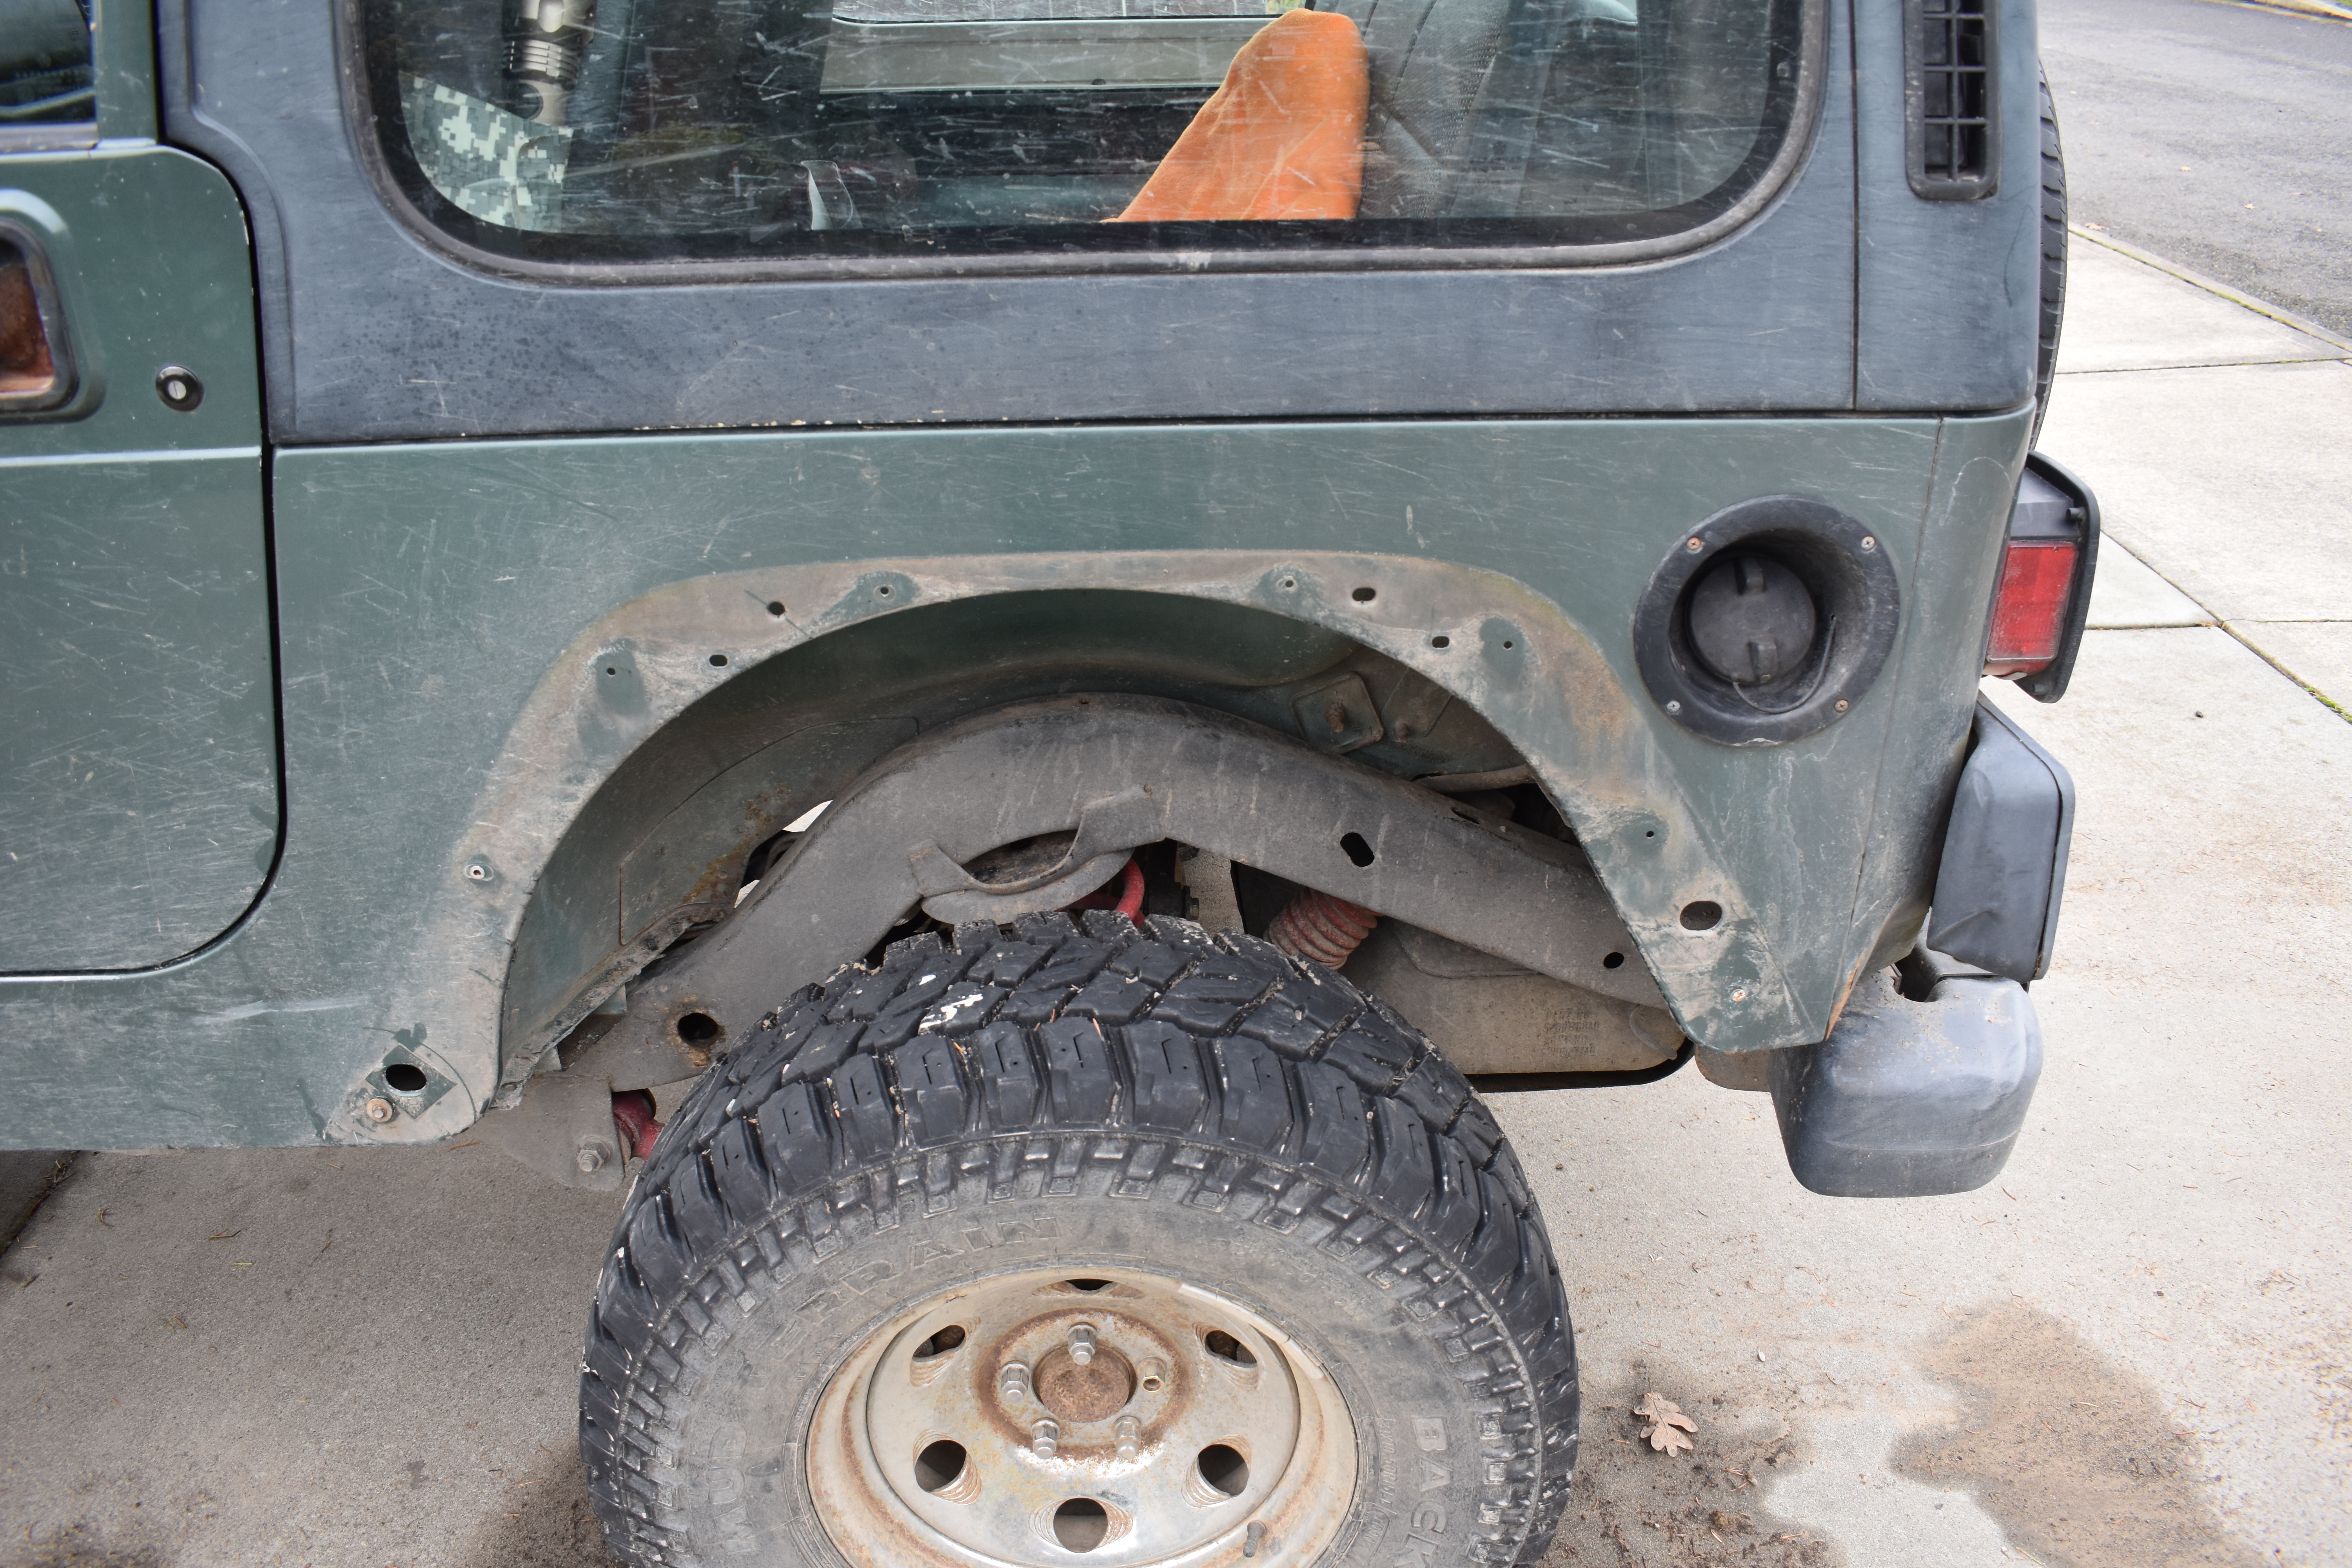
The Rear:
- Grab some pliers or a fastener tool and pull the plastic fasteners holding the rear inner fender in. Either remove the inner fender completely, or just bend it back as needed.
- Now you can grab a wrench and start removing the bolts that hold the rear flares on. Some use rivet nuts that should be clamped to the tub, and some use plastic nuts that you will have to hold to stop them from spinning.
- There are about 8 bolts per rear flare, and after you remove them, the flare should come right off.
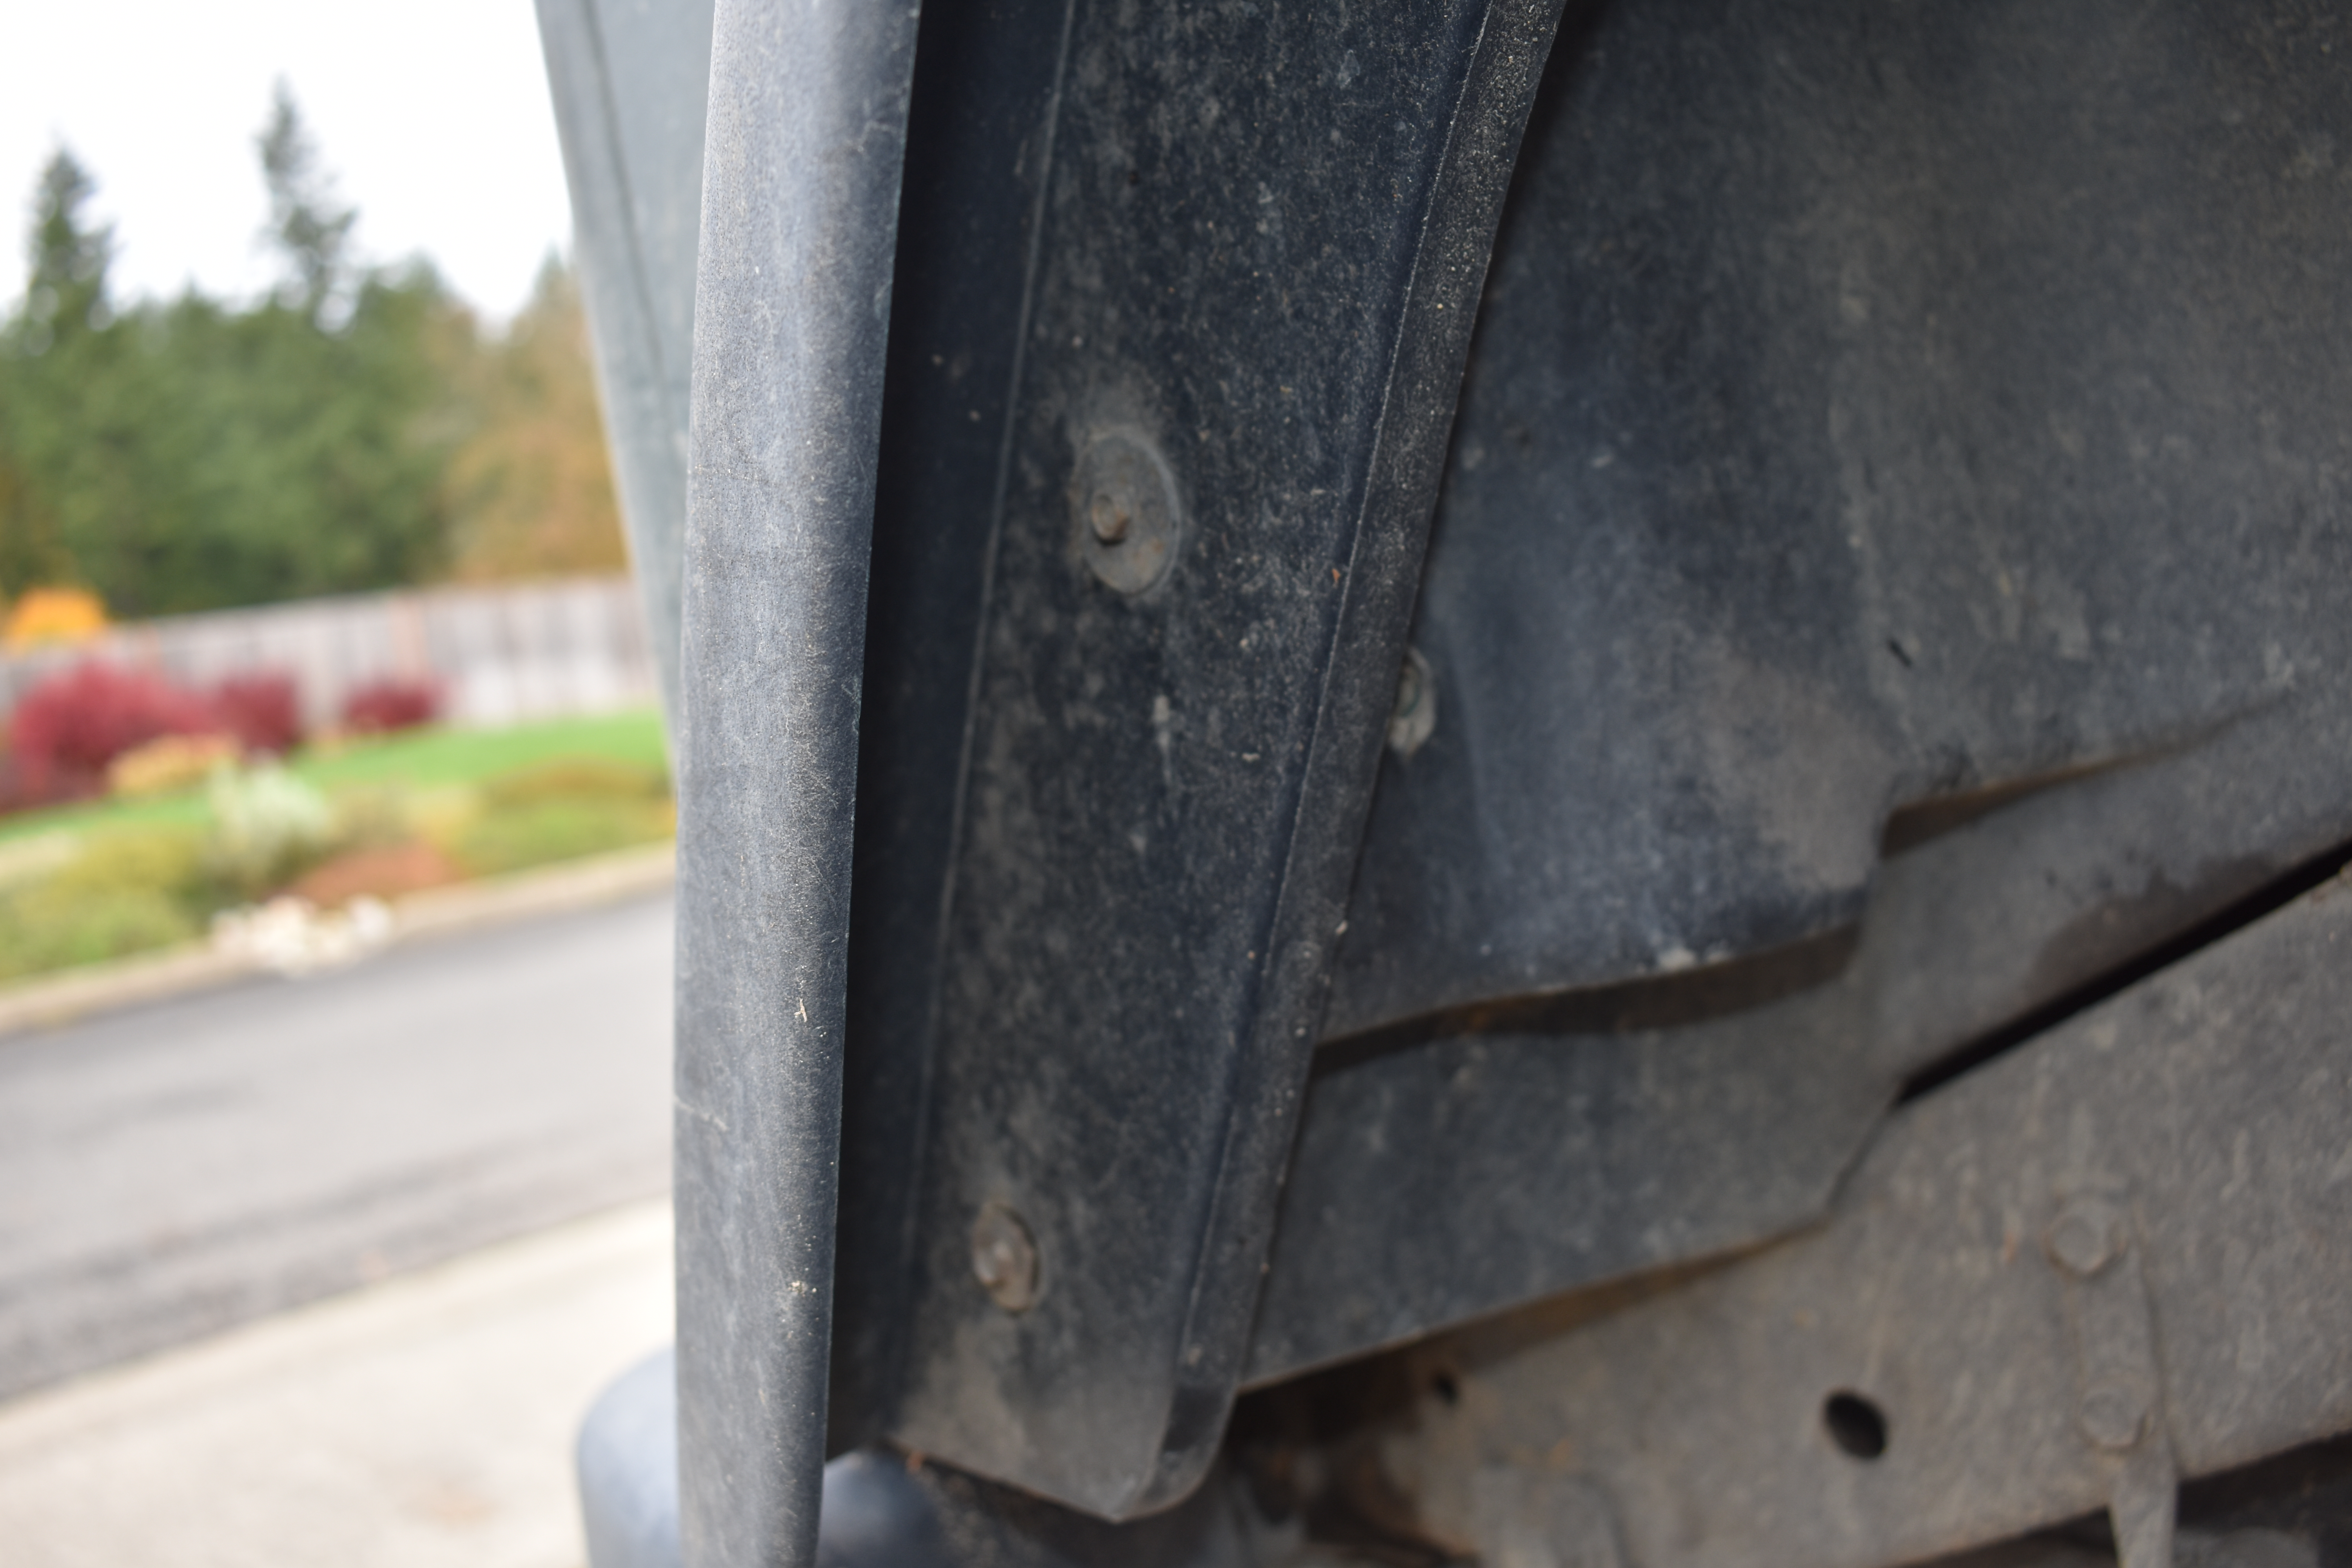
- 2 of the 3 rivet nuts spun in the tub on each side. The rivet nut closest to the back can be gripped with locking pliers and allow the bolt to be removed.
- We were able to simply "yank" our flare off despite the last bolt, so you may have success with this. If you have two left, it may still be possible. If you remove the flare this way, youu will be left with bolts stuck in the tub, and we well cover this a bit later.
Unfortunately, this is where our issues began:
- Repeat these steps on the other side to remove both rear flares.
Now that the rear flares are off, we can move to the front.
- There are no inner fenders to fight, so to start you only need remove the bulb for the side marker from the flare.
- Starting from the front of the fender, remove the bolts holding the flare on. All except for the last three use the plastic nuts instead of rivet nuts.
- If the rivet nuts here spin, we were able to reach into the tub from the bottom and get locking pliers on the back of the lower two rivet nuts. It is cramped, but doable. We were unable to get to the third one, and yet again "yanked". You may be able to reach the 3rd though, so it may be worth a try
More issues:

Now we just need to remove the little rocker flares:
Note: You may be able to simply trim them, but we opted to remove them permanently, to make room for some future sliders.
- Each flare is held on by 3 rivet nut bolts, remove them and the flares should come right off.
- The front-most rivet nut can be grabbed with locking pliers from the same hole as the rivet nuts that held the front flare, the other two may be reachable, but we could not.
- "Yank"
Yup, more rivet nut issues, only 1 of the 6 bolts actually came out as intended.
Now that all the flares are off, we need to solve for those stuck bolts. If none of yours stuck, you may still want to replace or otherwise deal with the rivet nuts here, to avoid issues in the future.
There are a few choices here: You can drill access holes to the rivet nuts in the tub, grind them out, or otherwise remove them. We ground them off, and that's what we'll cover here:
- The first step is simply grinding the rivet nuts and bolts down as much as you can. We have a bit of practice with our grinder, and were able to get them almost all the way without being too rough on the tub. Once they're ground far enough, we were able to use a punch to tap them out of the holes into the body. The bolts took a while to grind, but not too bad.
- Now that we have empty holes instead of stuck bolts, drill the holes out to the size of the new rivet nuts you'll be using.
- A few recommendations: Paint over the bare metal left from any grinding mishaps and from the drilling. We also recommend using high quality rivet nuts, especially stainless or other anti-rust rivet nuts. We put a little thread locker on the crimp zone to really help them stay put
- Now put the rivet nuts in, we bought a specialty tool, but it is possible to make your own tool out of a bolt and a few nuts.
With the flares off and the new rivet nuts in, we're ready to begin the install for the new flares!
The Install:
This part actually is fairly easy:
- Starting with a front flare, take a new bolt and nut without a washer, and insert them into the front-most hole to loosely attach the flare.
- Working backwards, loosely attach each bolt, washer, and nut in each hole in the new flare and metal fender, noting that the last three are rivnuts, and don't need nuts.
- Once all the bolts are in, tighten them, they don't need to be super tight, we just put ours a little past snug.
Your flare may not sit flush against the fender and there may be some gaps, but ours all went away as we snugged the bolts and pulled the flare to the fender.
- The flare is now installed, and all we need to do is snip the wires to the old side marker flares, and connect the wires to the new side markers.
- Repeat those steps for the other side.
Now for the rear. This step is similar to the front flares, except you have to fight the inner flare, and there are no lights to worry about.
Note: The instructions say that the rear fenders are marked L and R, however, ours were marked P and D for Passenger and Driver.
- Using either the Passenger or Driver flare respectively, install new bolts, nuts, and washers in each hole. Note that the rear-most bolt and two front-most bolts are rivet nuts, and do not need new nuts. Tighten the bolts after getting them all in loosely.
- Reinstall the inner fender into place, and secure it with plastic fasteners.
- Repeat these steps for the other side
That was a lot of steps, and a lot of potential issues, but now we can enjoy our new flares!
Before and after:

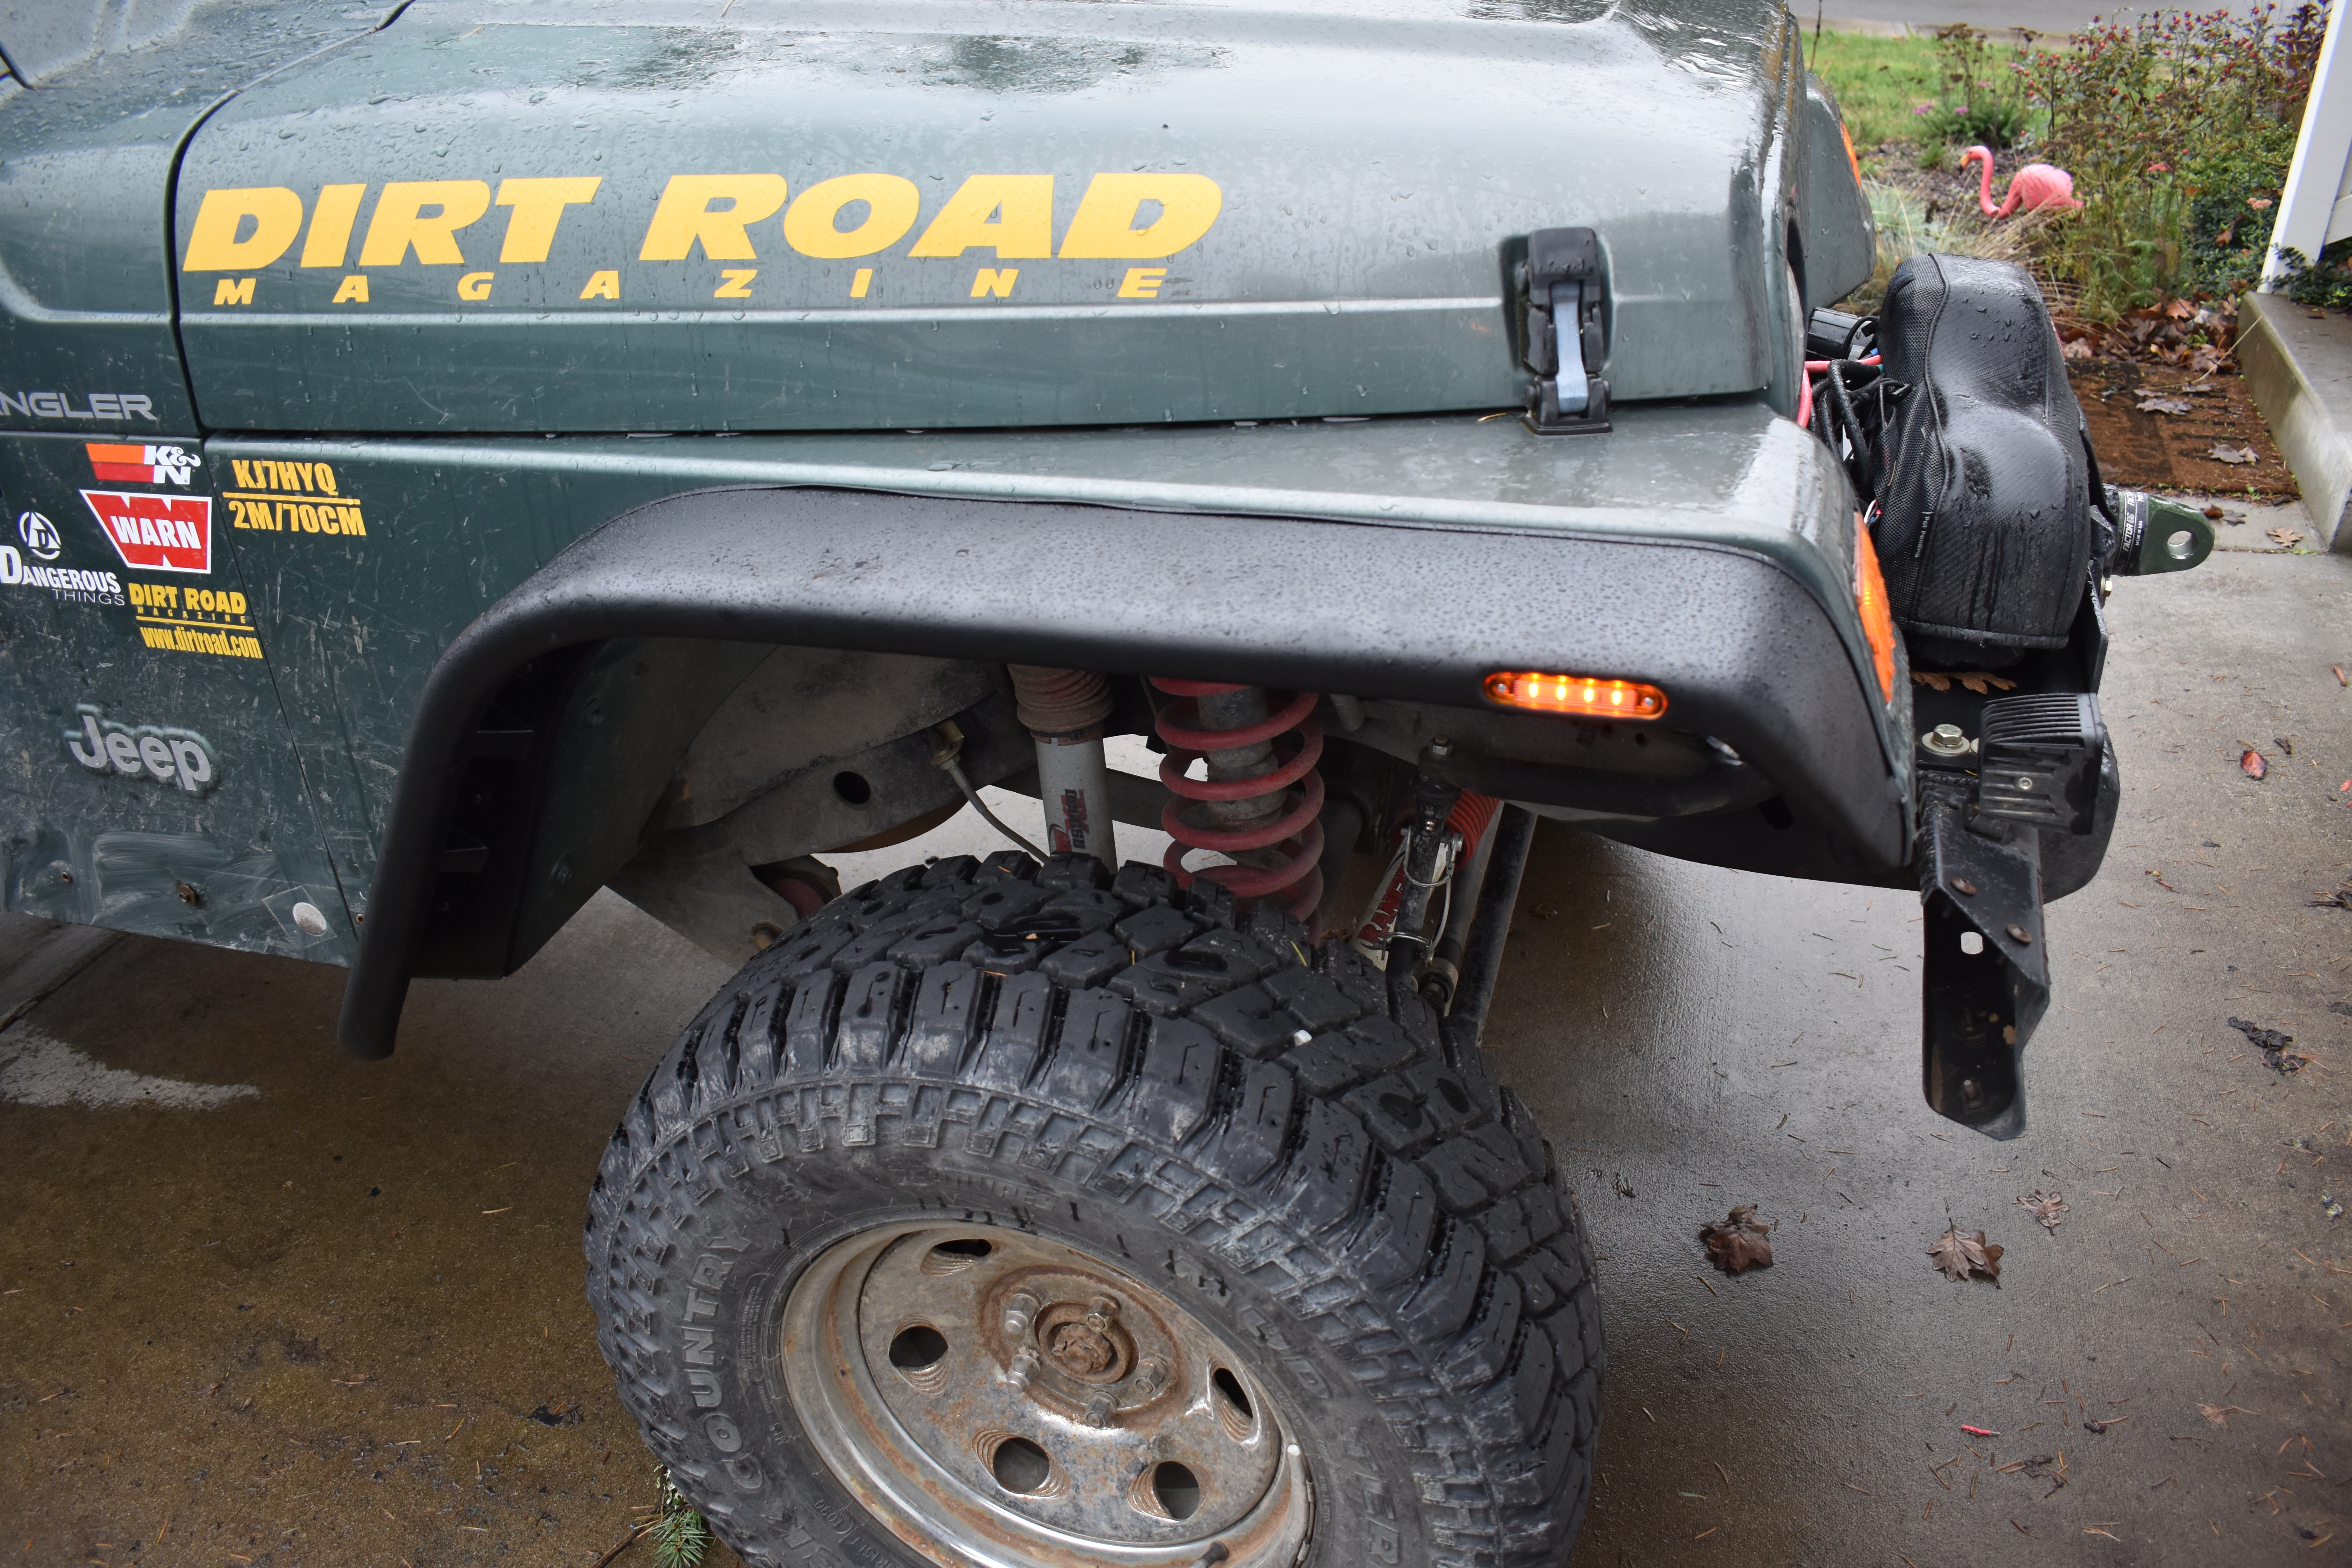
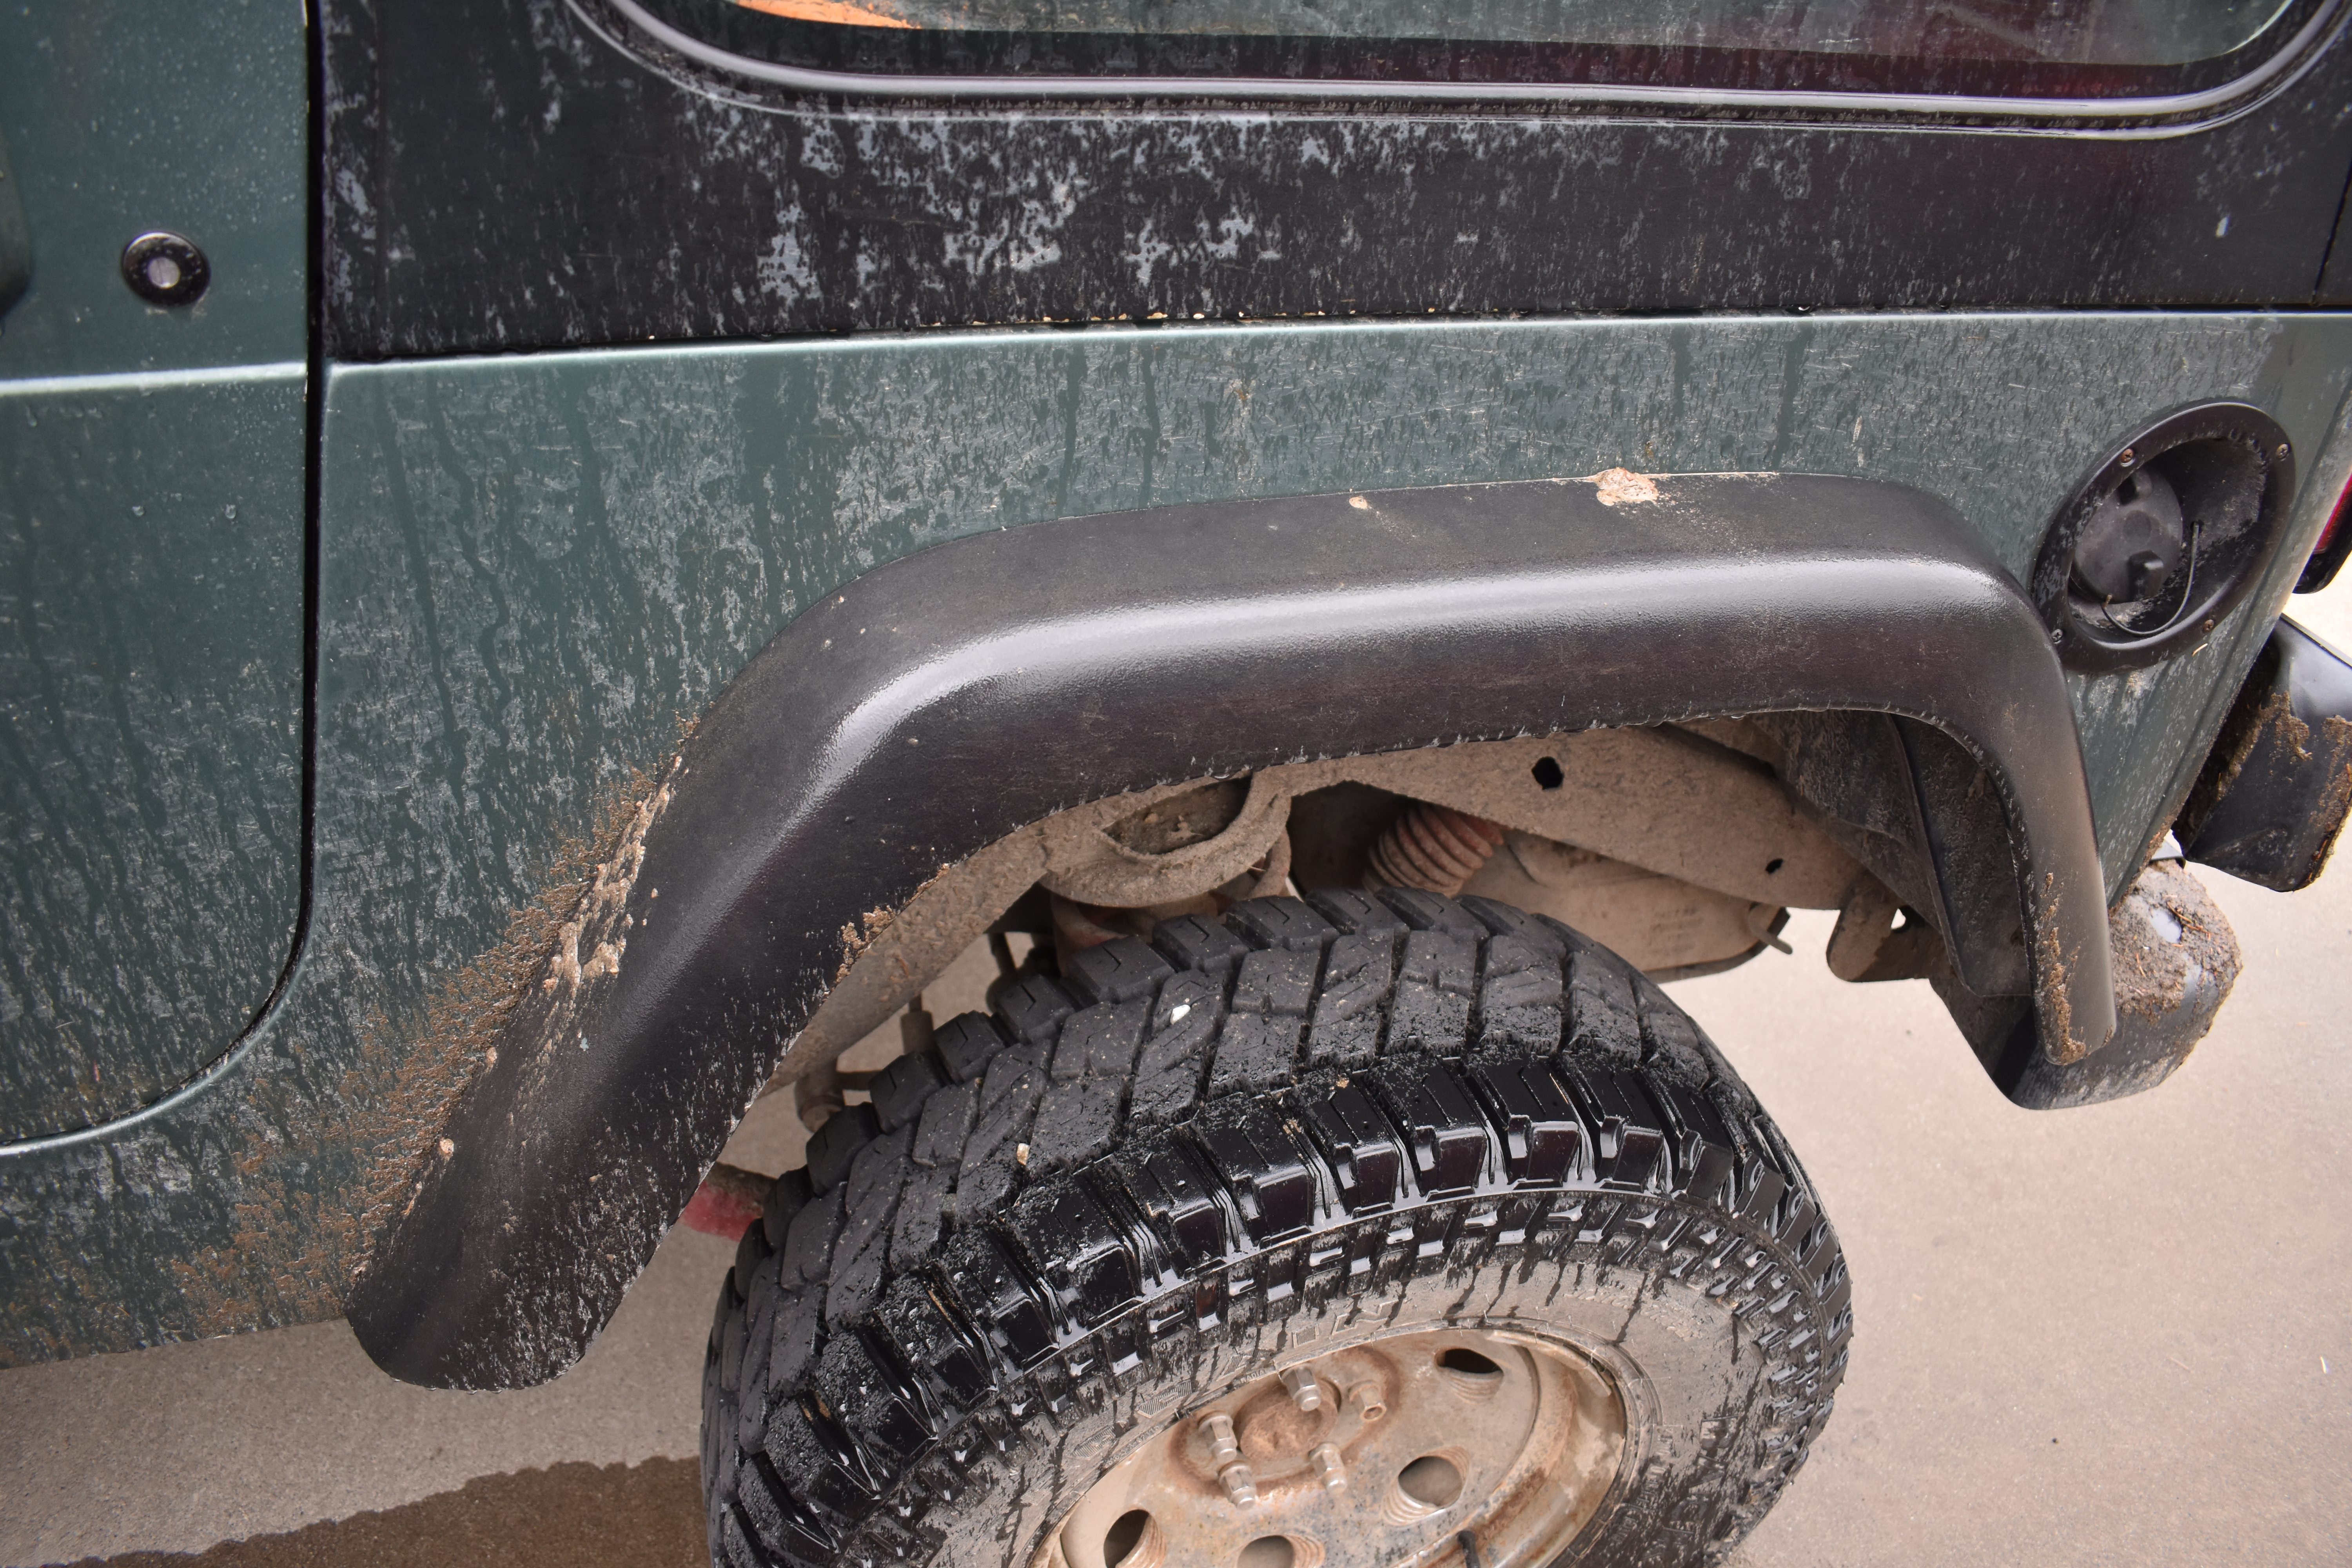
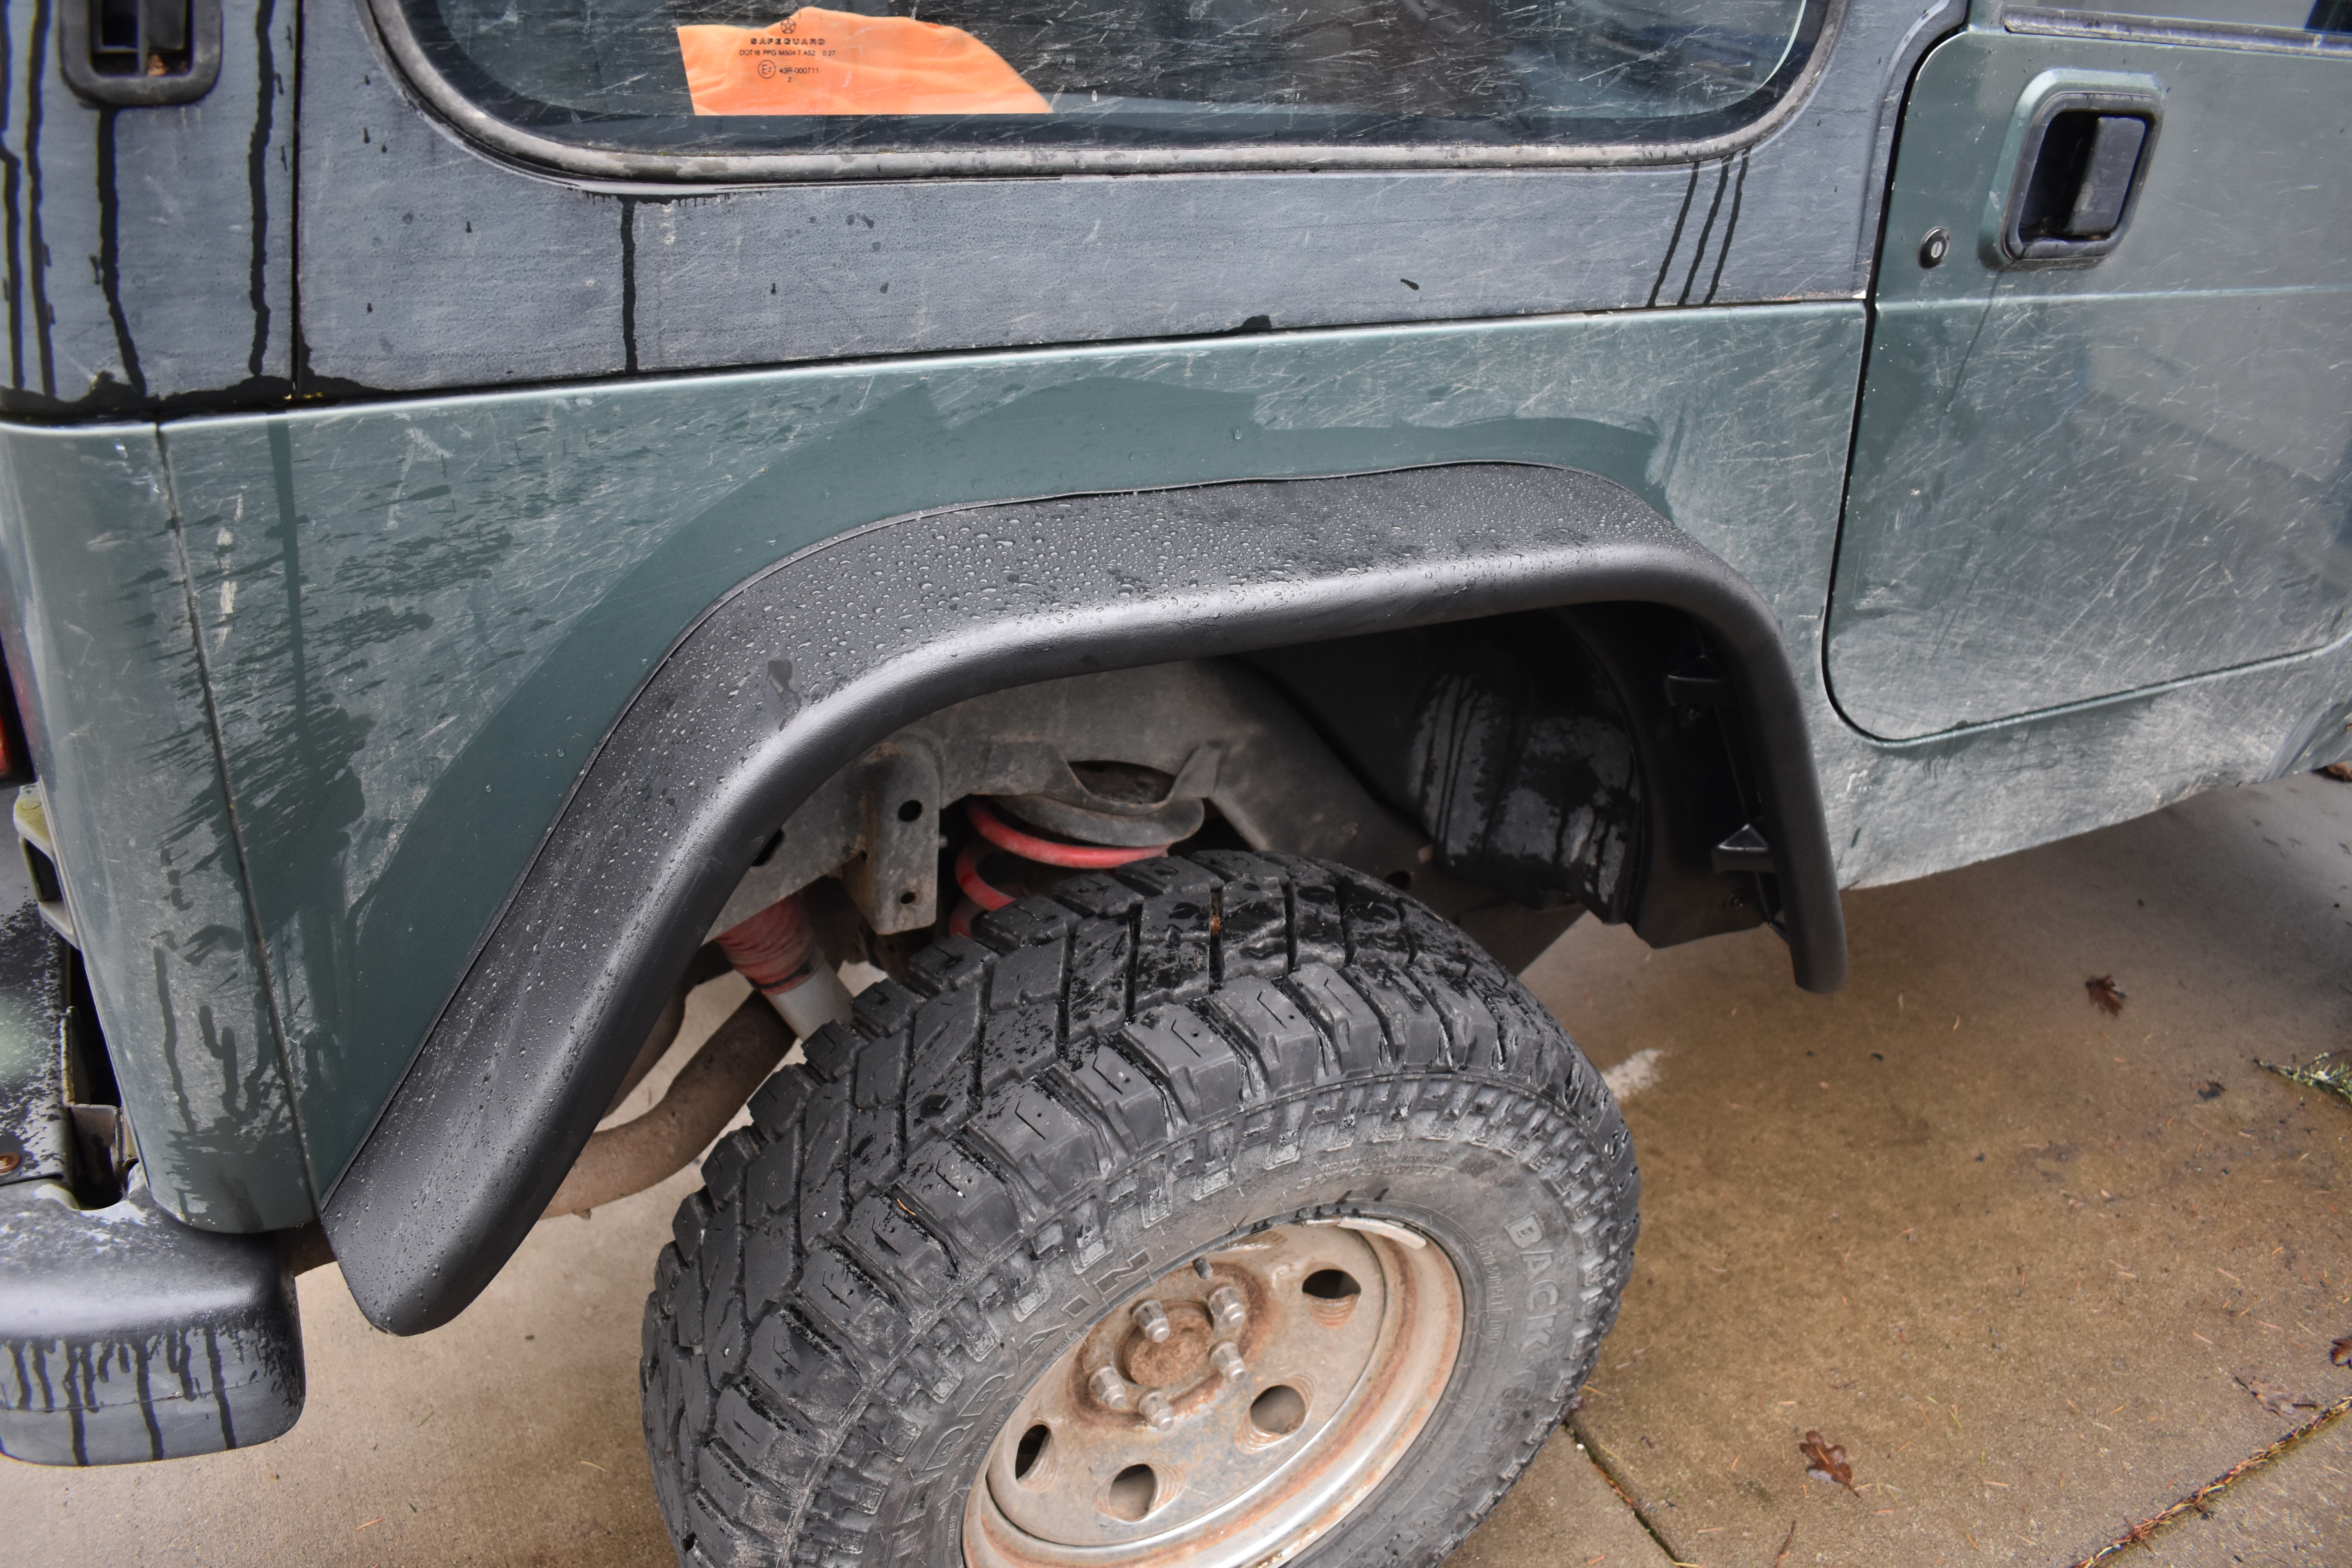
We like the looks a lot, and we can't wait to take these out and try to break them and test our flex.
The Review:
For fairness, we are rating this from two different perspectives, as a product and as a project. The product ratings reflect how we feel this particular kit compares to competing products, while the project ratings reflect how we feel about doing this upgrade with any kit, and is not meant to reflect on the quality of this kit in particular. We had some frustrations, but all of our issues were due to rust and issues on the Jeep side, not due to any of the new parts.
Product Review:

Well, frustrations aside, we really like our new fender flares. We don't need to worry about interference anymore, and they look awesome too. The plastic they are made of is a tough ABS, but they are still
flexible enough that we're not worried about smacking them into the occasional rock. These flares are paintable too, so if you prefer them to match your body color, that's doable. This also means any scratches should be easy to paint over if desired.
Compared to stock, these flares net us a minimum of 1" extra clearance, with much more in some locations. We really like that this kit comes with side marker lights, many similar kits don't and they're required in our state. The side markers are
also encased in a nice thick resin, which should provide more than enough weather proofing.
 The rubber lining the flares come with seems very nice and uses genuine 3M adhesive
The Breakdown:
Now that you've seen the install and heard some of our thoughts, lets break down our rating:
Price: These flat fenders are a little cheaper than some of the competition, but seem only a little better than average. It is noteable though that many of the other kits don't come with the LED Side Markers. Overall, better than average: 7.5/10
Sturdiness: Not bad, ABS is a tough plastic, and these things have a lot of impact absorbing flexibility. It's not a metal fender, but as far as plastic flares go: 9.75/10
Quality: The flares themselve don't have any isues yet, the fitment was a bit weird in a few spots and we had to wrestle them on, but they seem decent. The side markers and rubber lining are nice, however, the hardware included with this kit has
already started to show rust, and doesn't seem to be the best quality. 7.5/10
Installation: See our project review for more info about the "uninstallation", but any kit would have those issues, as such we don't take them into account here. For this kit in particular, the install is great, the hardware seems nice and there's
no "hard" parts, it just takes some wrenching time. It was a one person job (We did it alone, on a sloped driveway, and in the Washington rain, so it can't be that bad). The instructions are pretty nice and we didn't need anything more
than common hand tools. 10/10
Warranty: This product is protected by Extreme Terrain's standard 30 day limited warranty. This is unfortunately below average for these products, with some competitive products offering 5 year or limited lifetime warranties,
and well below what we like to see here at Dirt Road, however, many online retailers don't offer warranties directly at all, and we find this just a little below average overall: 4/10
Support: Extreme Terrain has been very willing to help us and answer our questions in our dealings with them: 10/10
Overall, we're pretty impressed with these flares and give them 4 Gears. It's not perfect, but the flares met or exceeded all of our expectations quite well. We wish the included hardware was of higher quality and it should not have
already rusted, but we're happy with the rest of the kit.
We'll be sure to update you as we continue to use these flares off-road and smash them into stuff, and let you know if anything changes or breaks.
Project Review:
If your Jeep is totally rust free, chances are this will be a much higher rating for you and the kit will come with everything you need. Our Jeep was hardly the "usual" in some ways, like this rust, ouch!

However, for the average Jeep you should probably expect to at least have to drill out some rivet nuts and find a way to replace them as this seems to be a common issue. If like us you don't have a rivet nut tool, you'll have to consider getting one or start thinking about alternatives like drilling access holes in the tub. Neither is super appealing, but something has to be done. If you do drill holes, keep in mind that you should paint or otherwise coat the edges of any holes you drill to help prevent rust.
Initially, we wanted to drill and go with through bolts to replace the rivet nuts once and for all, but in the end we opted to avoid as many new holes as possible, and picked up a rivet nut tool. We also recommend grabbing a pack of new plastic fasteners for the rear inner fenders, we picked ours up from Amazon, but you can find them at your local parts store too.
Despite our difficulties, this style of flares still offer you more clearance than stock, and are useful upgrades. We think it's still worth it if you like them and don't want metal fenders. Just prepare for some potential frustration if you're going to take on this project yourself. If you do decide to undertake this project anyways like we did, we think the Barricade kit we used was a great choice, and it works really well for us.
This review was supported by our friends at:
